The designs here run from a scatter of sprinkles on a plain frosted cake to a fully themed Ocean or Cars cake, so the real range is how much of the decorating you are willing to do yourself.
Your piping confidence decides which one is yours: if a wobbly line worries you, choose a design where fruit, flowers, curls or store-bought toppers hide the frosting, and save lettering and ruffles for when you have practiced.
Several of these, like the Potted Plant Birthday Cakes, can also give each guest a cake of their own.
1. Rainbow Swirls
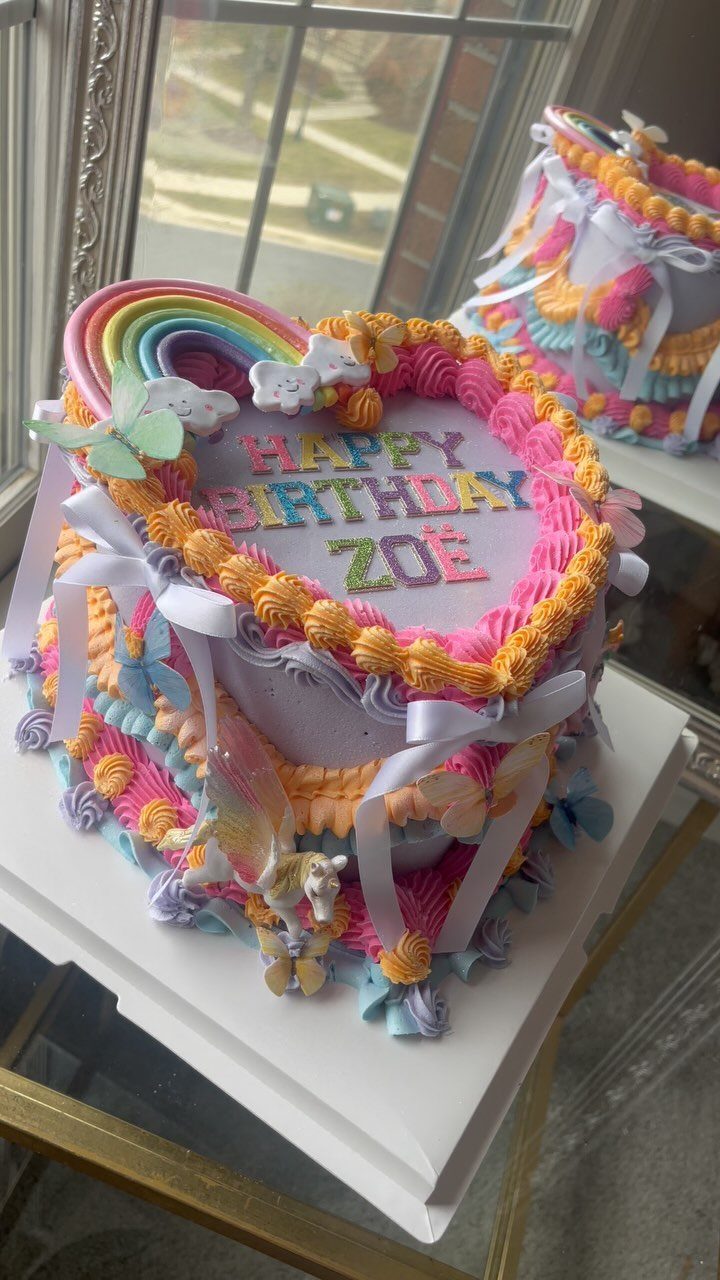
Swirled icing is the forgiving way to get a colorful cake. Each swirl can wobble a little and still read as a rainbow, so a first-time decorator isn’t punished for an unsteady hand.
A heart-shaped cake like this one needs no special skill beyond the pan. Stick with a few bright colors and leave plain space between them, which keeps the swirls from muddying into one another.
Store-bought toppers for the rainbow and butterflies save you the fussiest work.
2. Rainbow Cake
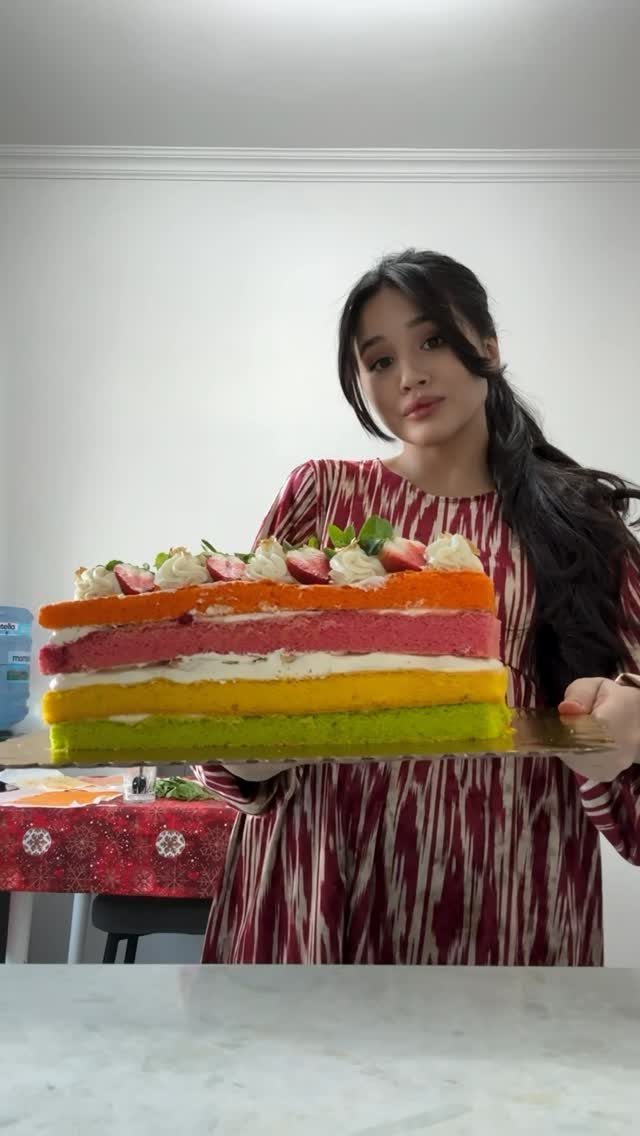
Color lives inside this cake, so the slice is the real decoration. Tint each layer its own color and keep the outside simple: whipped cream and a ring of strawberries is enough.
For a beginner, I’d split one batter into equal bowls and tint each one, rather than mixing a separate recipe for every color. Gel coloring gives stronger shades than liquid.
Plan on more layers meaning more pans and more washing up. Cool each layer completely before you stack and frost, or the cream will slide.
3. Edible Flowers
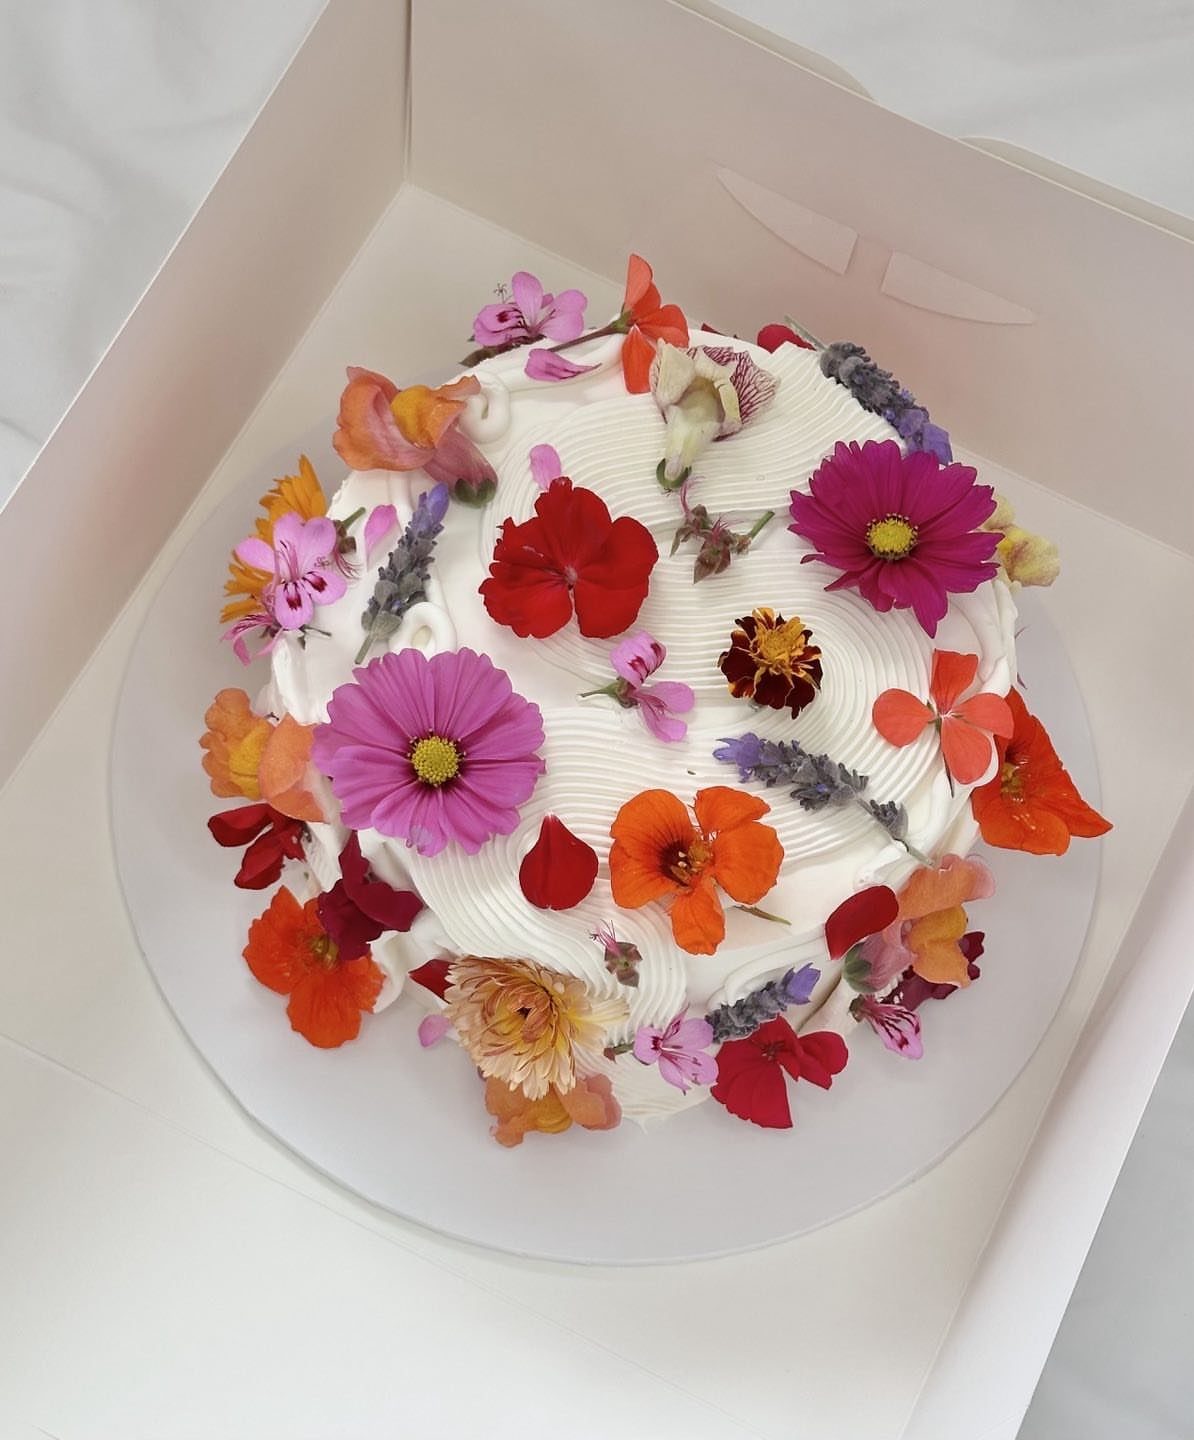
Fresh blooms on a white frosted cake do the work of piped petals, and you never touch a piping bag. Smooth white frosting acts as the backdrop, so a spatula and a steady turntable are about all the skill required.
Buy flowers sold specifically as edible, and press the stems in at varied heights so the cluster looks natural. A mix of colors, as in this one, reads as a bouquet.
Transport it in a box like this to protect the petals.
4. Fruit Slices
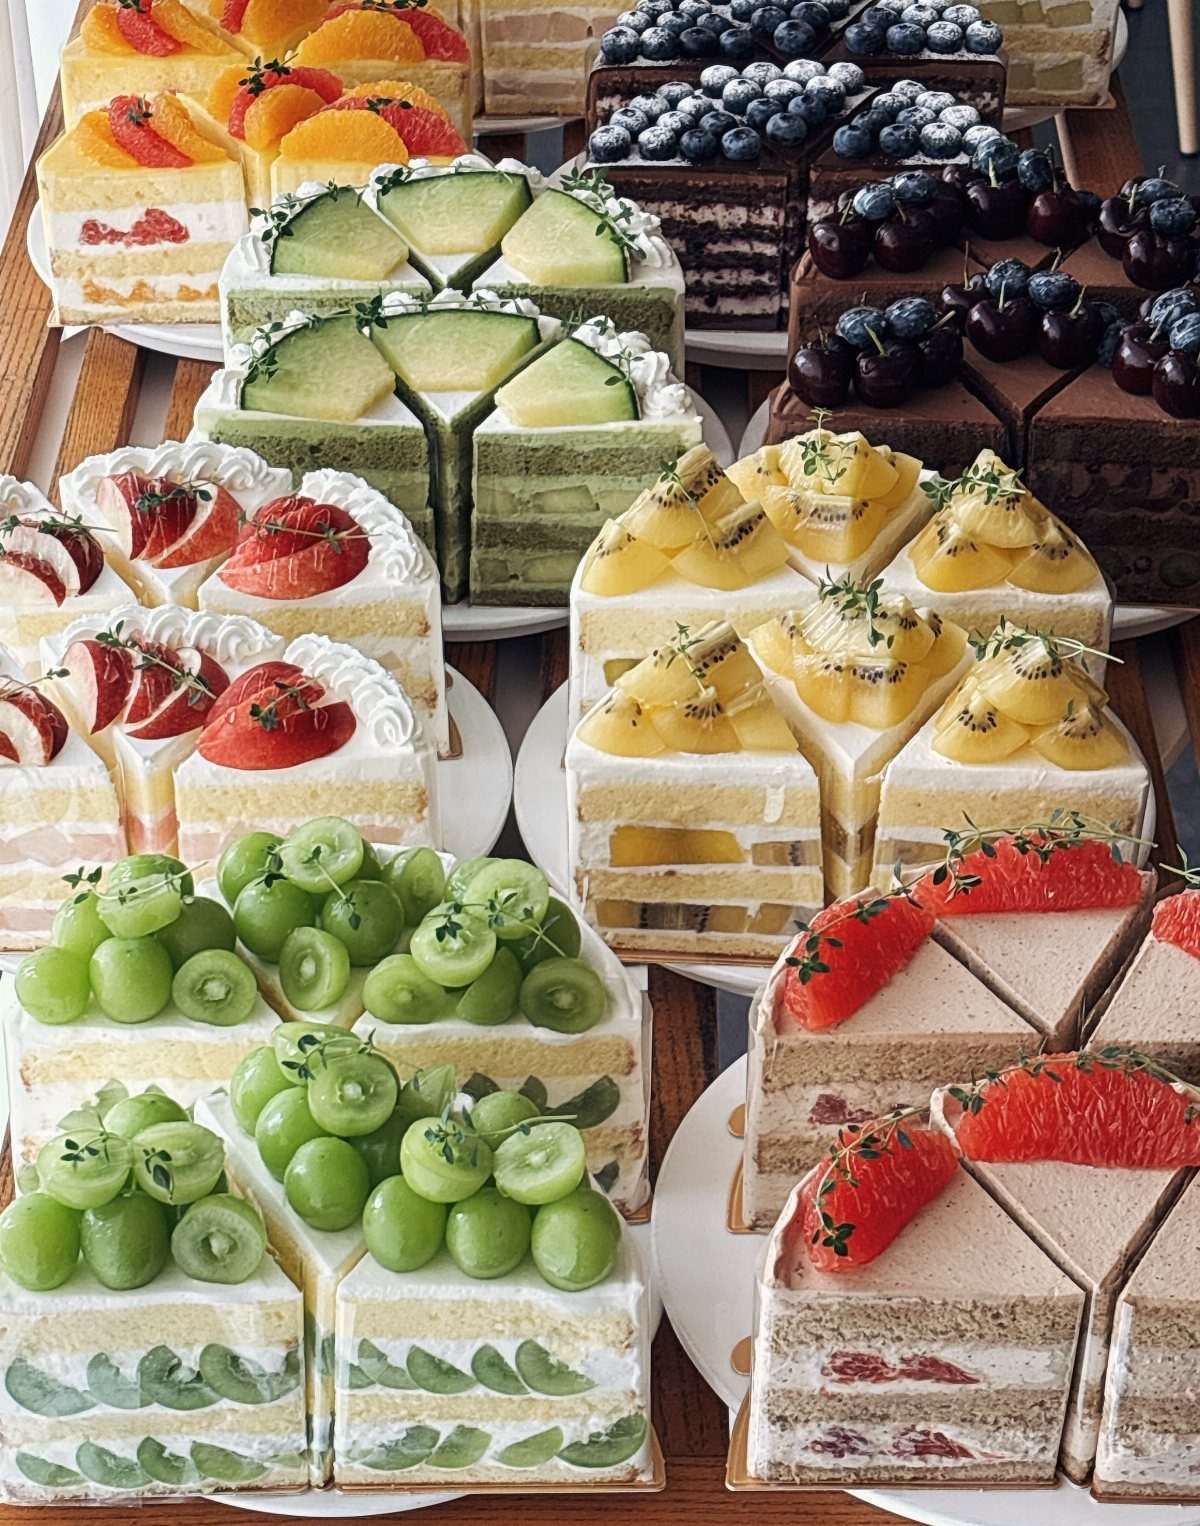
Check which fruits the birthday person loves most, then pile those on. Berries, kiwi, grapes and melon all sit happily on frosting, and the color does the decorating for you.
I like this for anyone nervous about piping, since fresh fruit hides uneven frosting completely. Cut slices thin enough to lie flat and keep pieces roughly bite-sized so the cake still cuts cleanly.
Cut and add the fruit shortly before the cake goes out, since it weeps juice into the frosting as it sits. Wet fruit sitting on cake for hours will weep into the frosting.
5. Piping Techniques
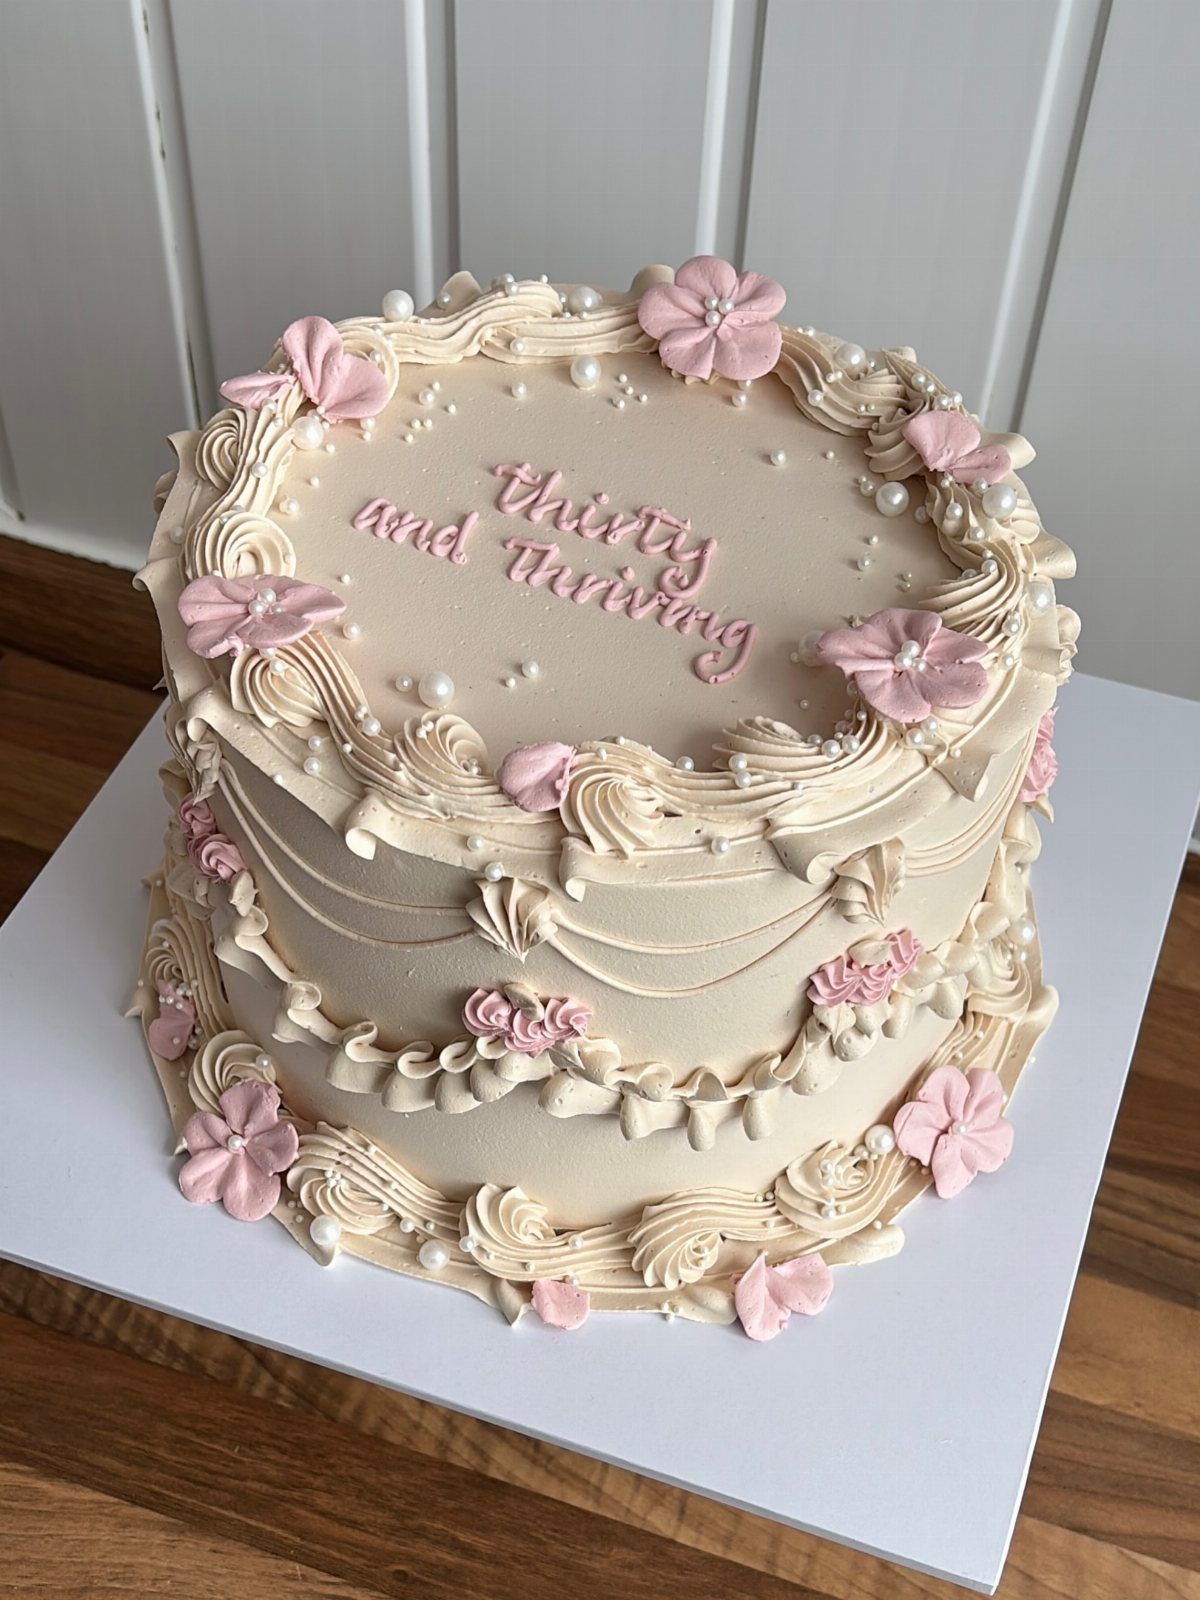
A single piping tip can look like several when you vary the motion: ruffles, small flowers, pearls and swirls all come from practicing with a few basic tips.
A limited palette keeps busy decoration from feeling messy, so stick to two or three shades of one color family.
If you’re new, I’d pipe the lettering last and keep it short, since a wobbly word is the hardest thing to hide. Practice each shape on parchment first, then scrape it back into the bag.
Stick to two or three shades of one color family and let the piped shapes carry the design.
6. Sprinkles
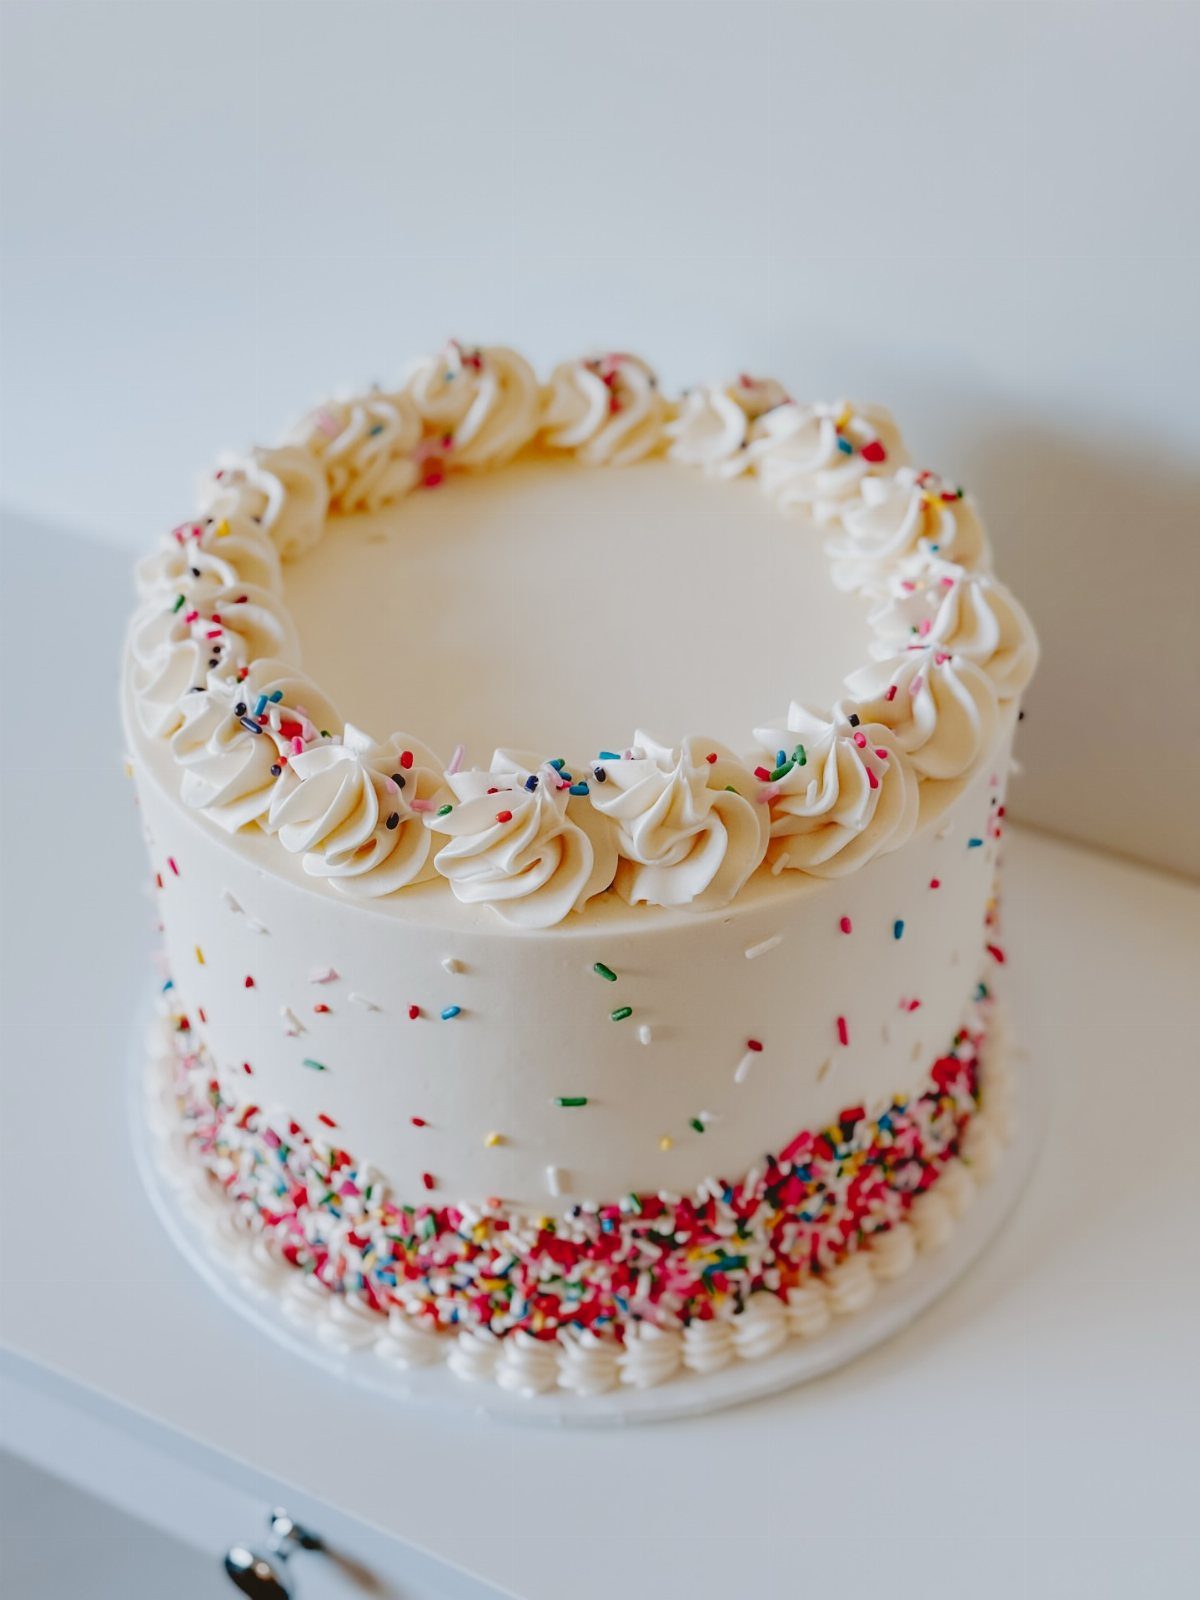
Sprinkles are the easiest decoration there is, and they still read as a party.
A band around the base of a white cake, as here, goes on in about a minute: hold the cake over a tray and press handfuls against the lower sides.
Chill the frosted cake first so the frosting is firm but still tacky. Piped swirls on top need only a star tip.
Choose sprinkles in a mix of colors, and keep extra on hand, since a fair amount falls away.
7. Ombre Frosting
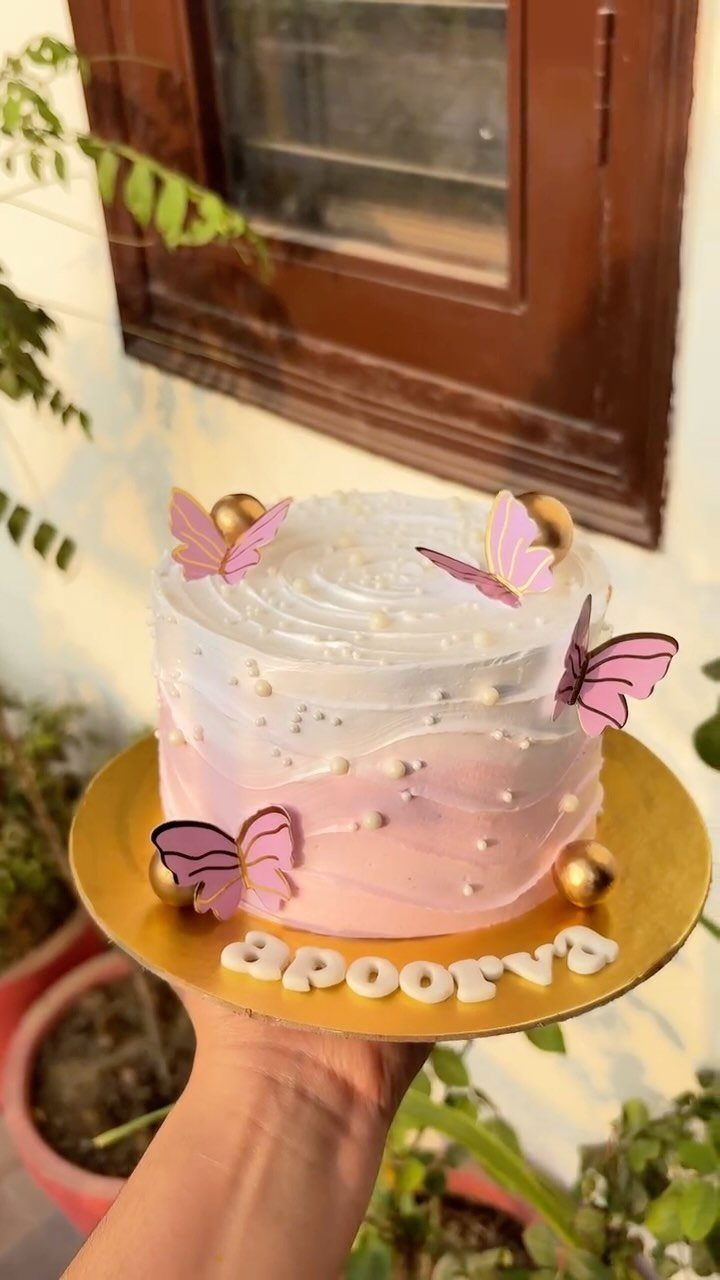
A gradient from deep pink to white looks fussy, but it comes down to dividing one batch of frosting.
Tint a few bowls in steps from pale to deep, then spread the darkest at the bottom and work upward, blending each band into the next with a spatula or scraper.
Tint the frosting in small amounts; you can always add more color, but you can’t take it out. Butterflies and gold balls, as here, hide any rough seam, and they are easy to buy ready-made.
8. Unicorn Cake
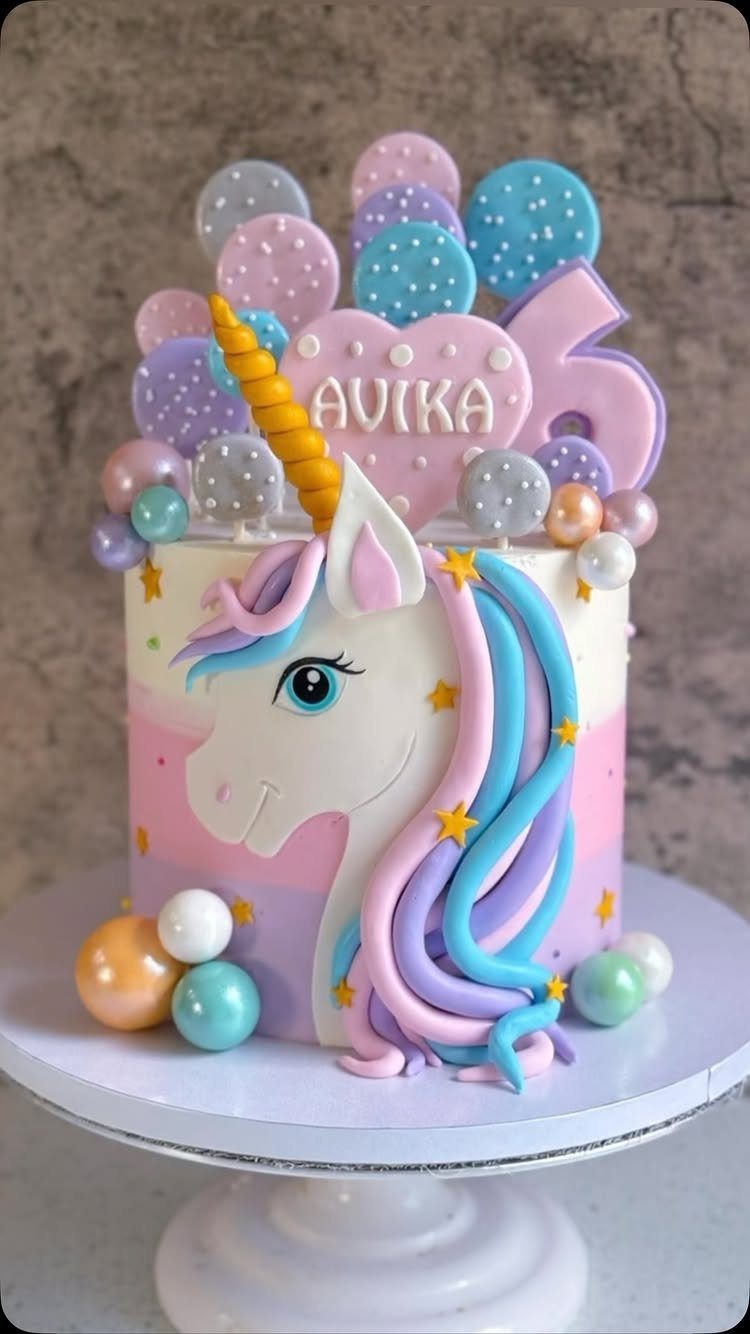
Unicorn cakes get their charm from 3 parts: a horn, a mane and a pastel body. A store-bought horn and ears save the hardest sculpting, and I’d buy them rather than shape fondant for a first attempt.
Pipe the mane as rosettes or swirls in several pastel shades, which hides uneven frosting underneath. Name and age toppers, like the heart and number here, personalize it with almost no skill.
Stack the layers tall and chill them so the cake stays steady.
9. Maximalist Cake Design
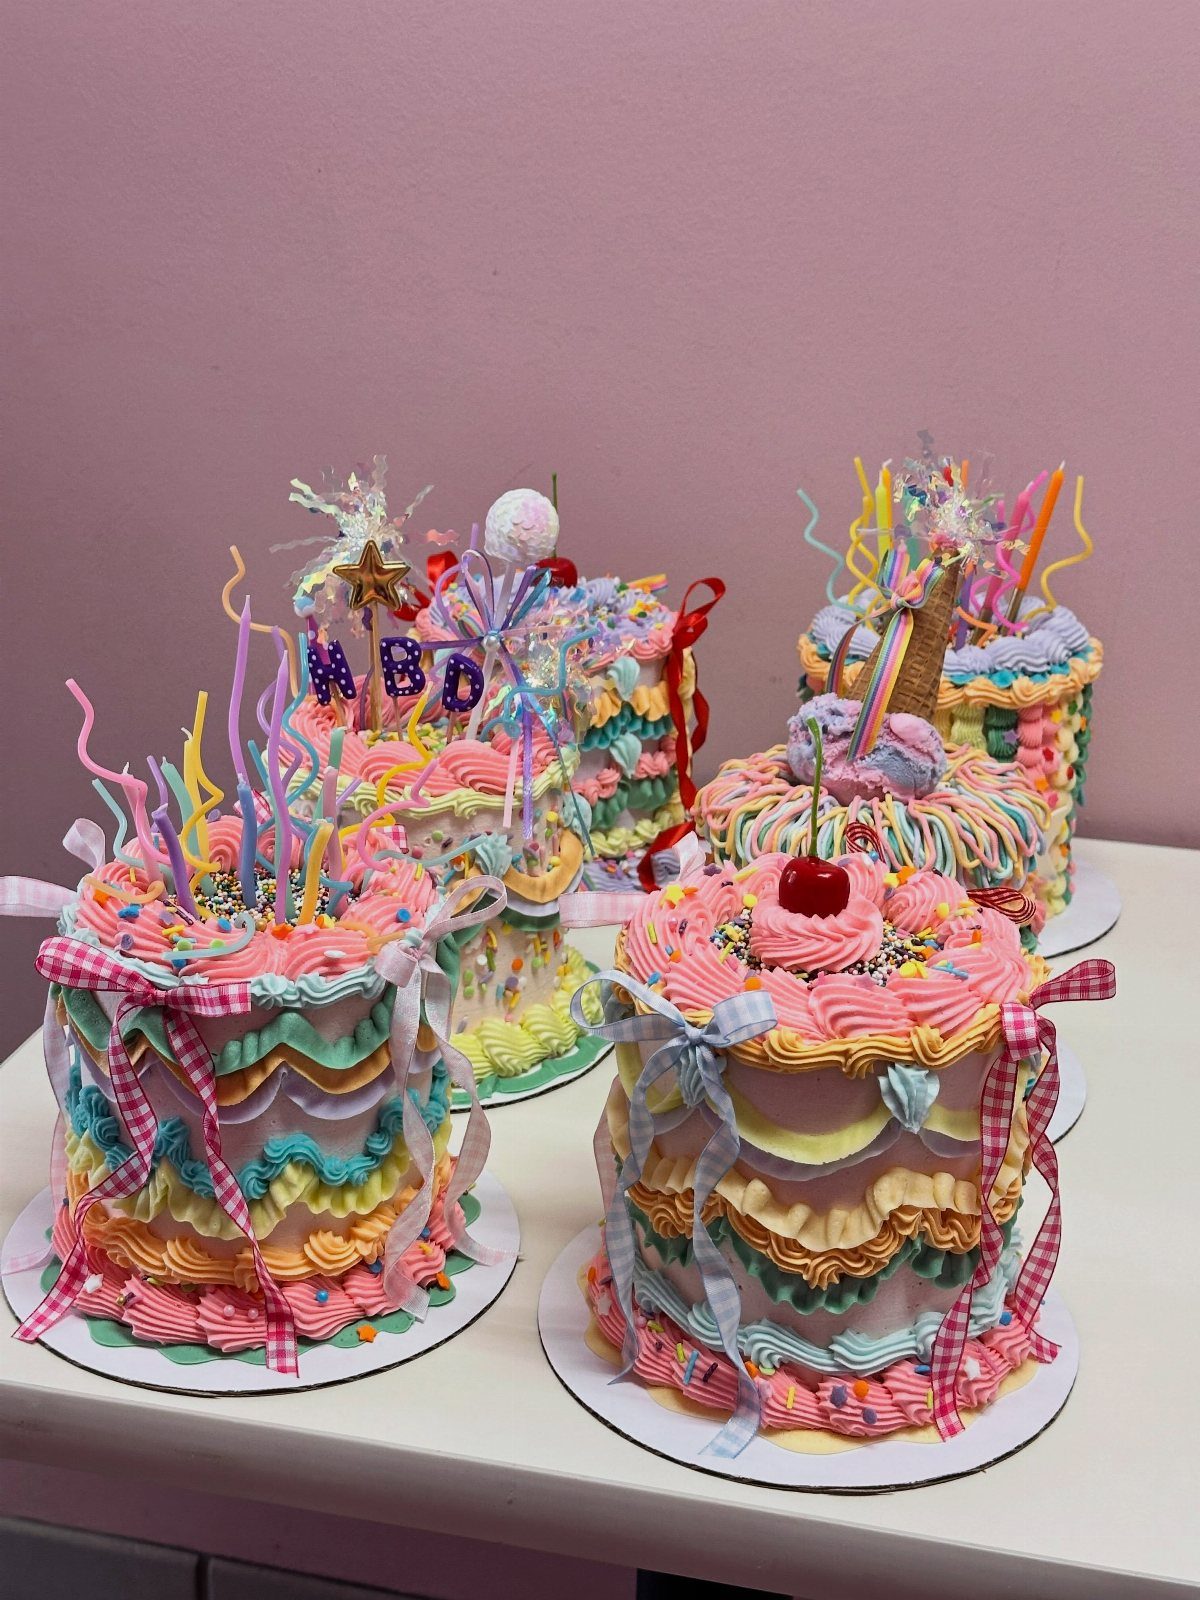
Maximalism has one rule: pile it on, then repeat. Ruffles, sprinkles, ribbons and toppers can all share a cake as long as the colors stay within one bright family, which keeps the crowding from turning chaotic.
For beginners, I’d pick 2 techniques and repeat them. Simple ruffles with a ribbon around the base look bold without demanding precision.
A cake like this uses lots of frosting, so make extra. A "Happy Birthday" sign can fill the final gap.
10. Chocolate Curls
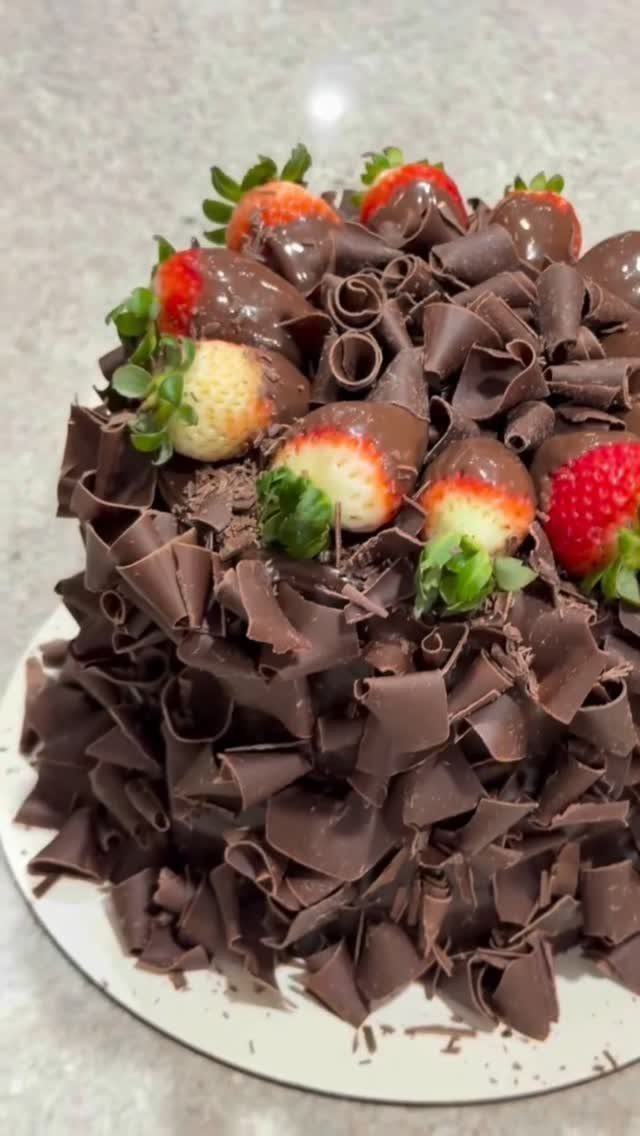
Chocolate curls turn a plain chocolate cake into something that looks bakery-made, and they hide a messy frosting job completely. Cover the whole top and sides, then crown it with chocolate-dipped strawberries.
To make curls, shave a room-temperature chocolate bar with a vegetable peeler, using long strokes. Chocolate that is too cold shatters into flakes instead of curling.
Press the curls onto the sides by hand, holding the cake over a tray to catch what falls.
11. Ocean Themed Birthday Cake
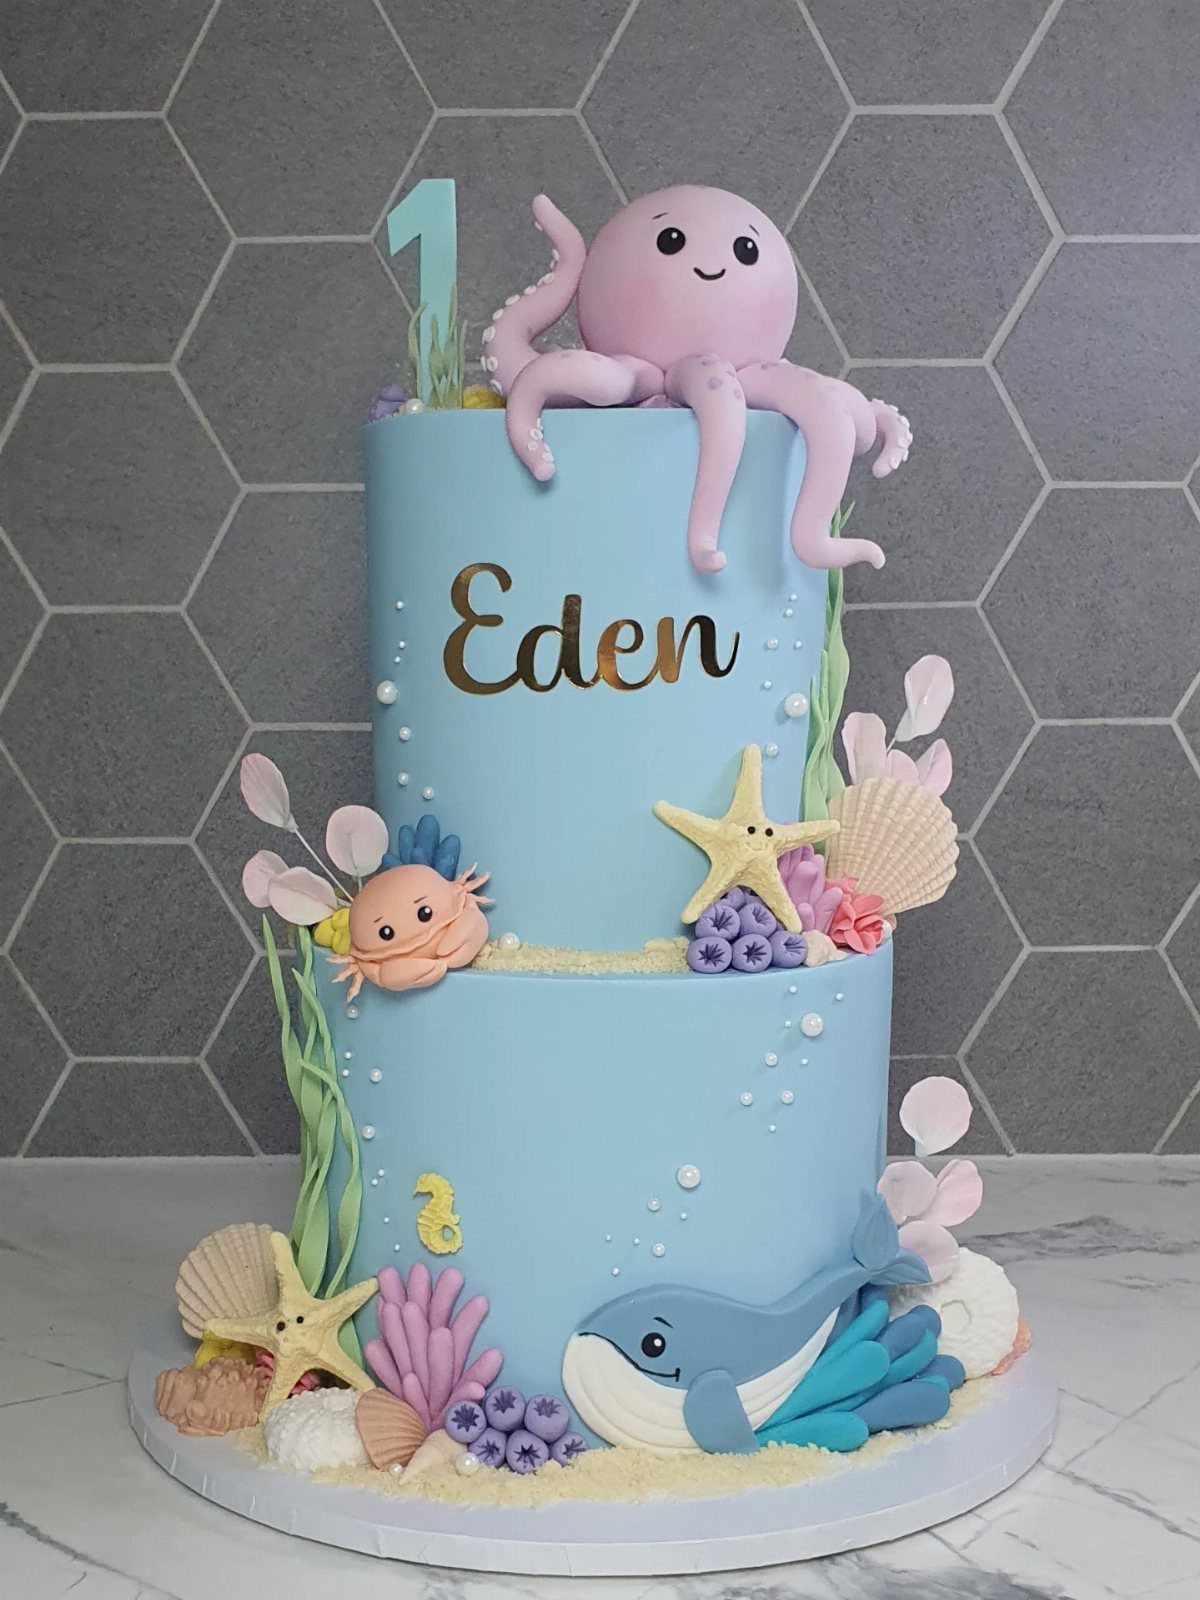
A pale blue cake gives fondant sea creatures a calm backdrop, so the animals do the talking.
Make the octopus, whale, crab and seashells ahead of time, since fondant needs a day or so to firm up, and then set them on the frosted tiers.
Store-bought fondant in several colors beats tinting your own for beginners. Keep the shapes simple: round bodies and dot eyes read clearly.
Gold lettering for the name and a number topper finish the cake.
12. Cars Movie Themed Cake
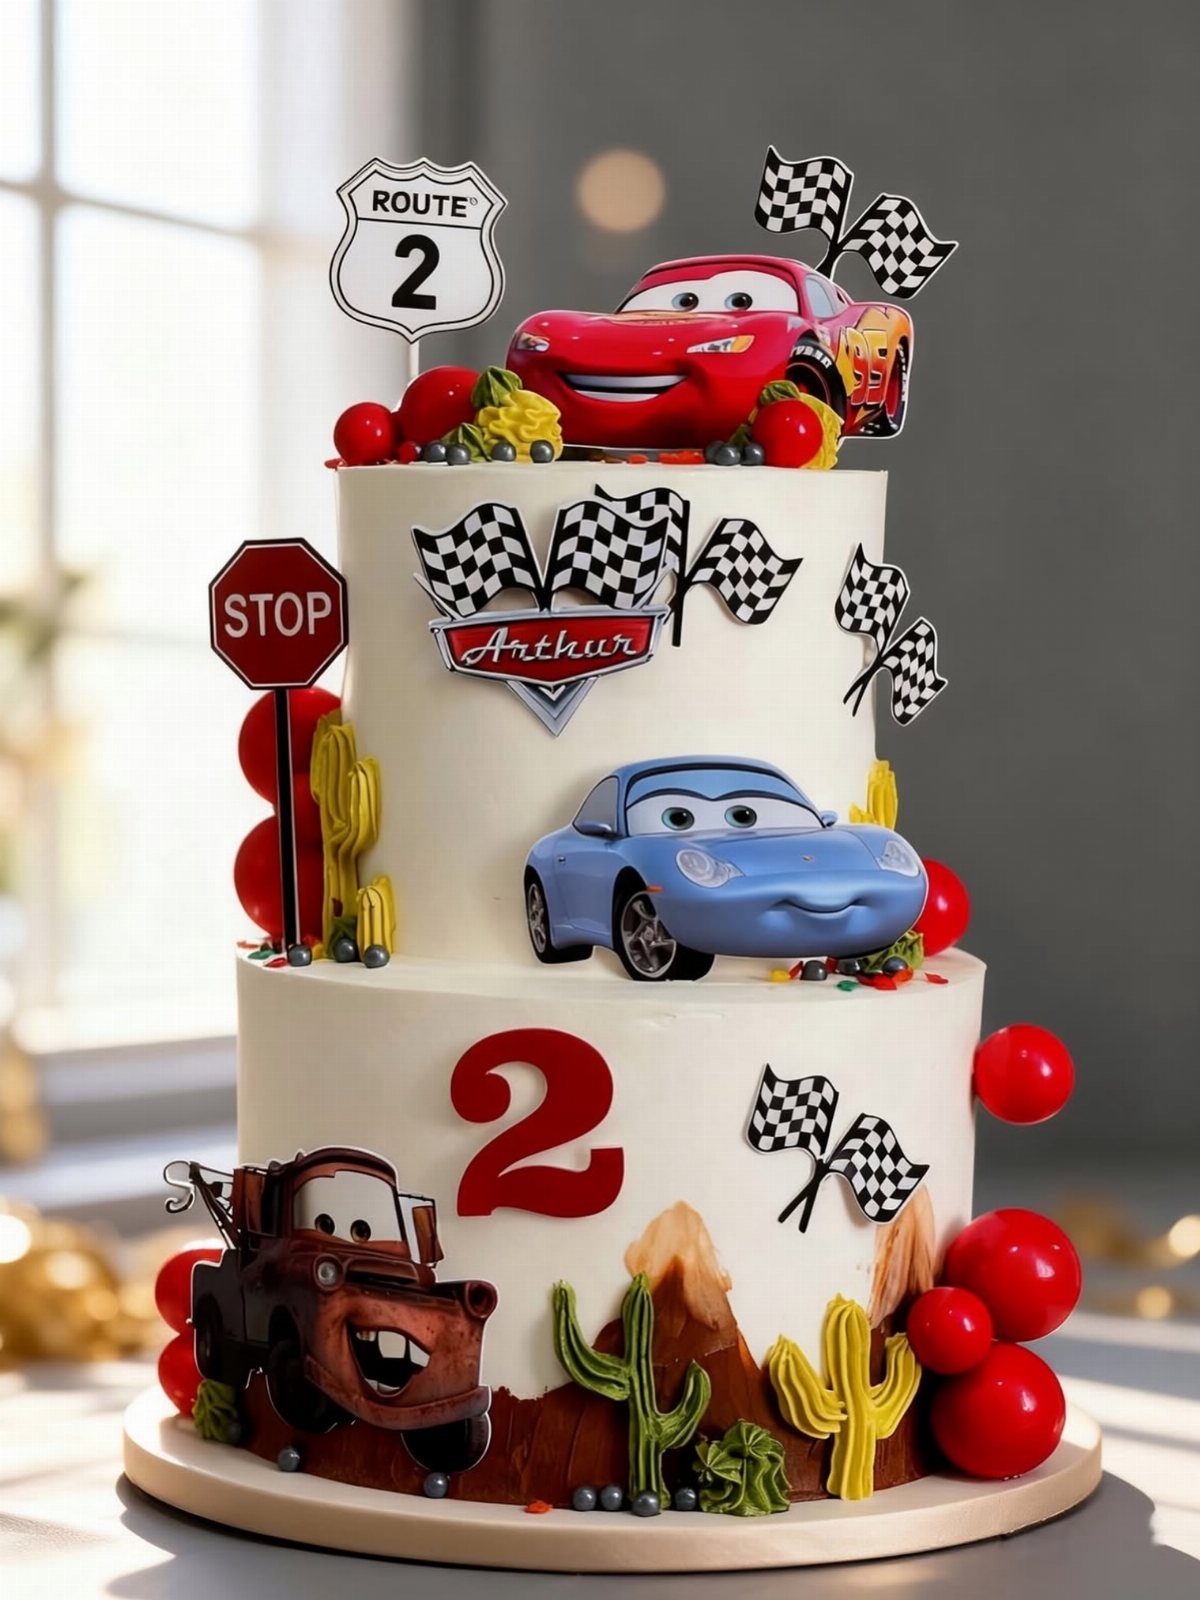
Character figurines are the shortcut here: buy the toy cars, and the cake only needs a white base, a few signs and checkered flags. That keeps the work to frosting 2 tiers smoothly.
I’d print or buy small road signs, like a stop sign, and fix them to toothpicks. Add a nameplate and a big number in red for the age.
Wash and dry the toys before they touch the frosting, and take them off before cutting.
13. Minnie Mouse Polka Dot Cake
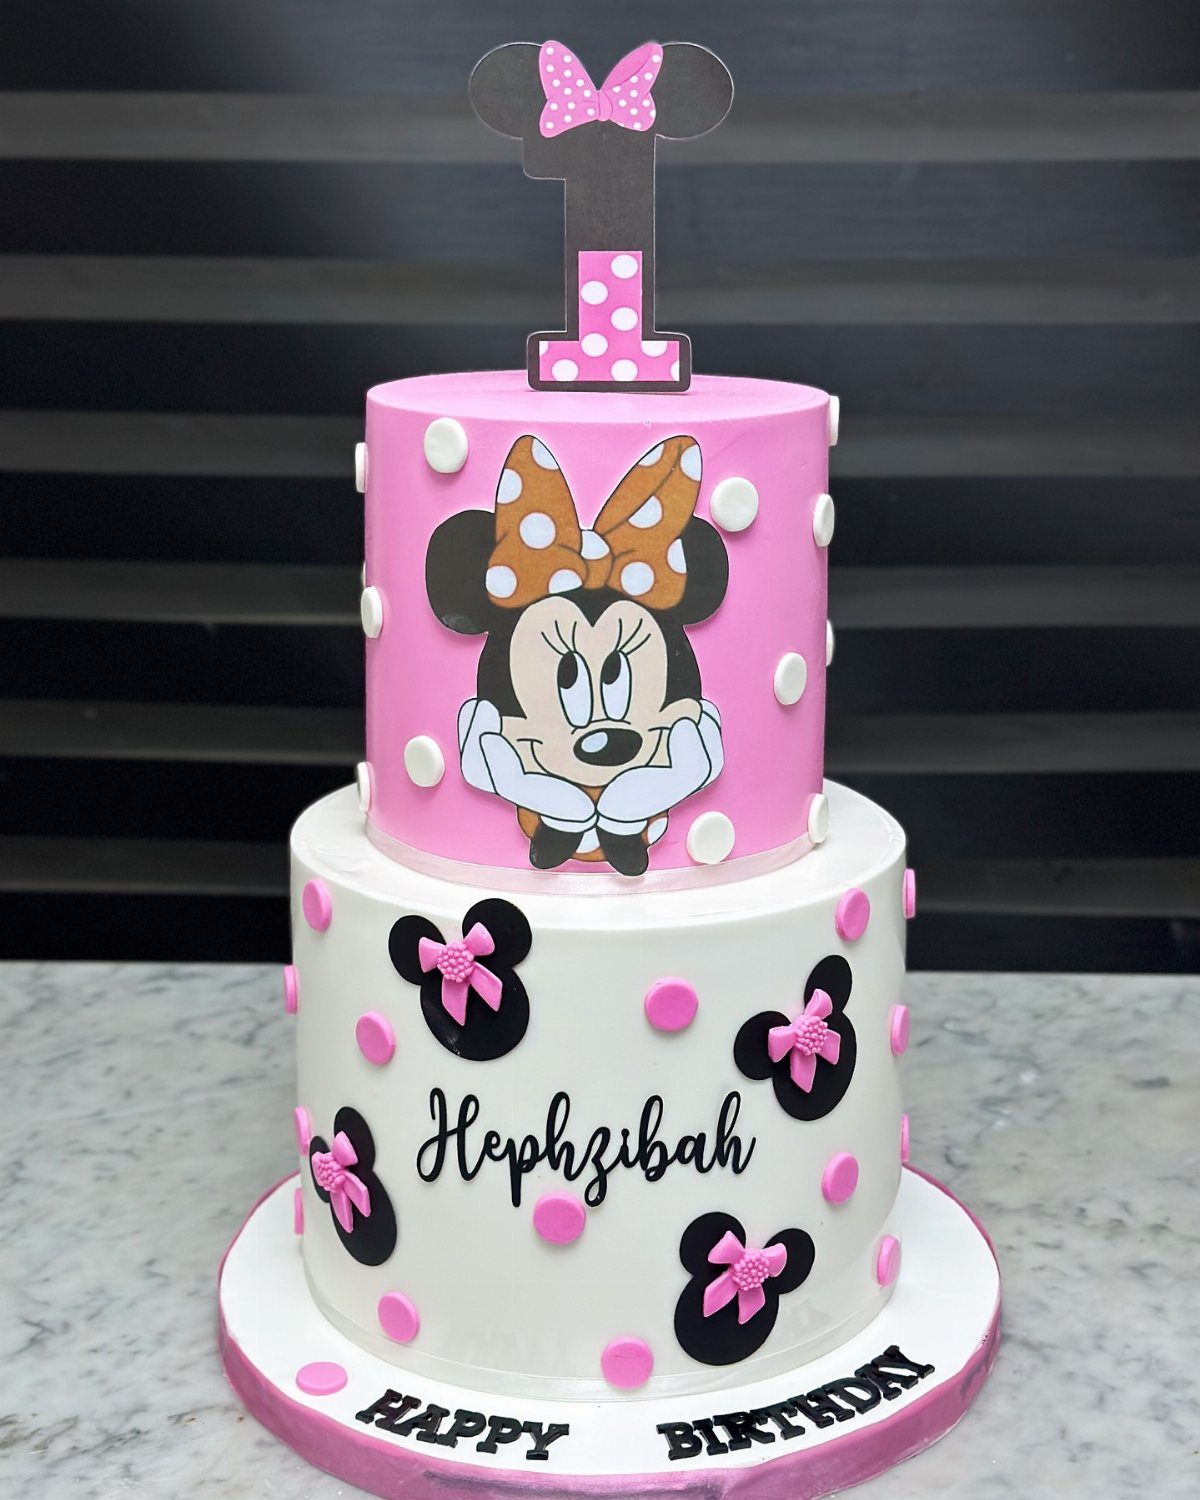
Polka dots are the cheapest way to say Minnie Mouse. Dots on pink and white need no character sculpting, and the bow and ears do the rest of the recognizing.
For dots, I’d press the rounded end of a wide piping tip or a straw lightly into chilled frosting, or pipe small even rounds. Keep them spaced the same distance apart, since uneven gaps are what the eye catches.
A store-bought bow and number topper, like the "1" here, saves the fussiest work.
14. Ribbon and Bow Vintage Cake
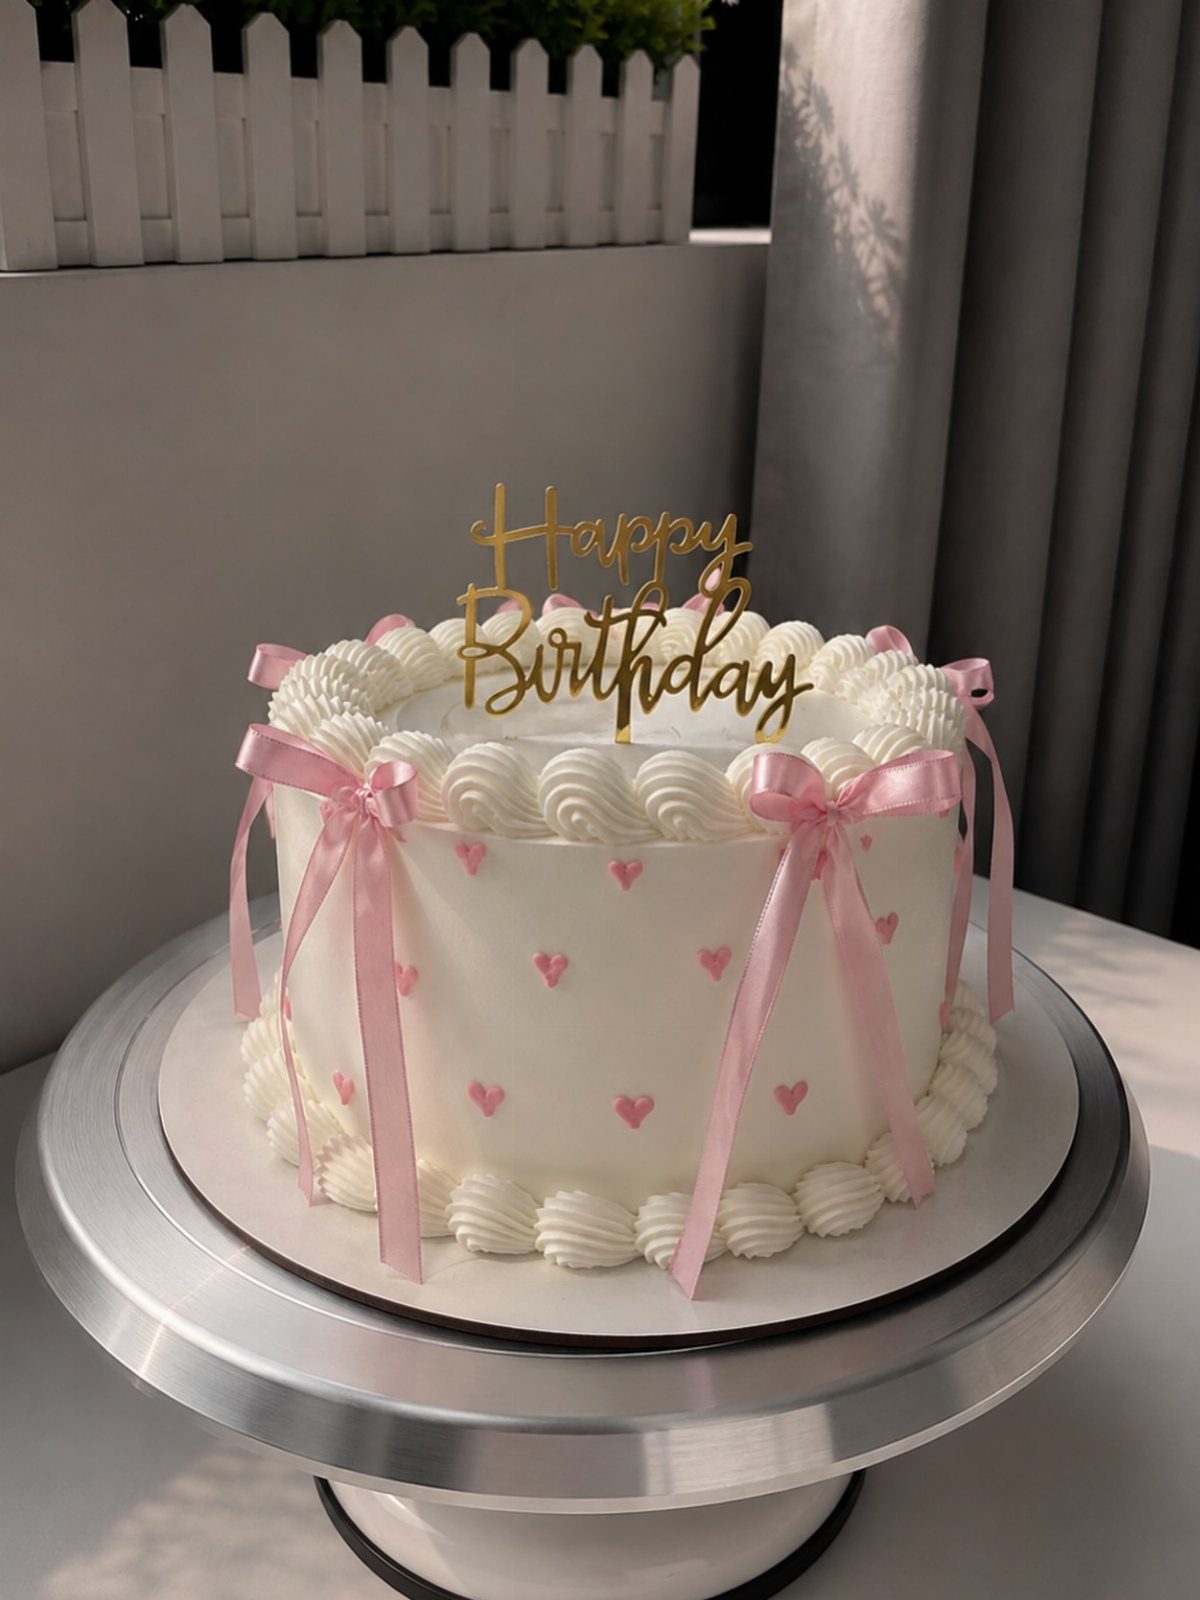
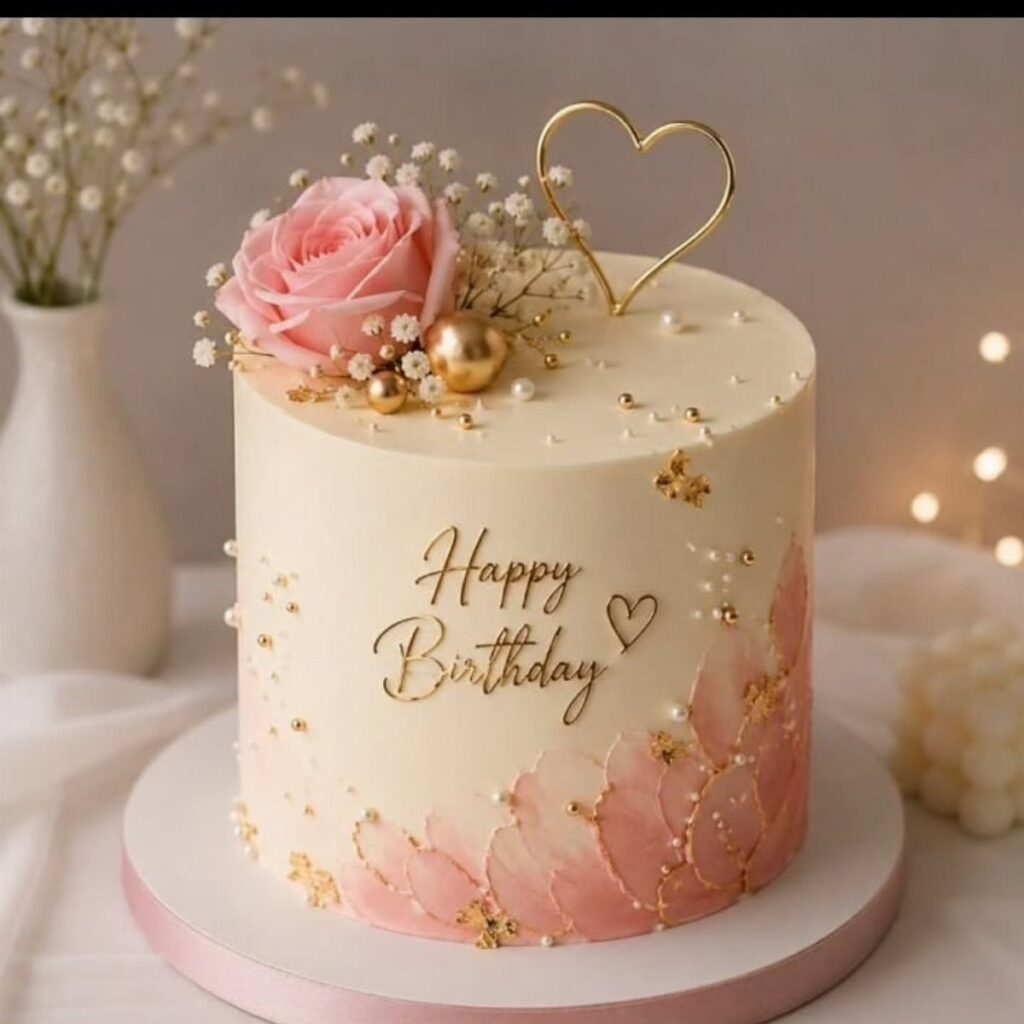
Pink satin ribbon tied into bows gives a white cake a vintage look without much piping. Pipe a simple border, scatter heart sprinkles, and the bows will carry the whole design.
Ribbon is cheap and fast, but wrap it clear of the frosting or keep it off the cake itself.
Fabric should never sit directly on the frosting, so set the bows on a small piece of parchment, or lift them off before slicing.
A gold "Happy Birthday" topper finishes it, and it’s easy to buy ready-made.
15. Purple Butterfly Cake
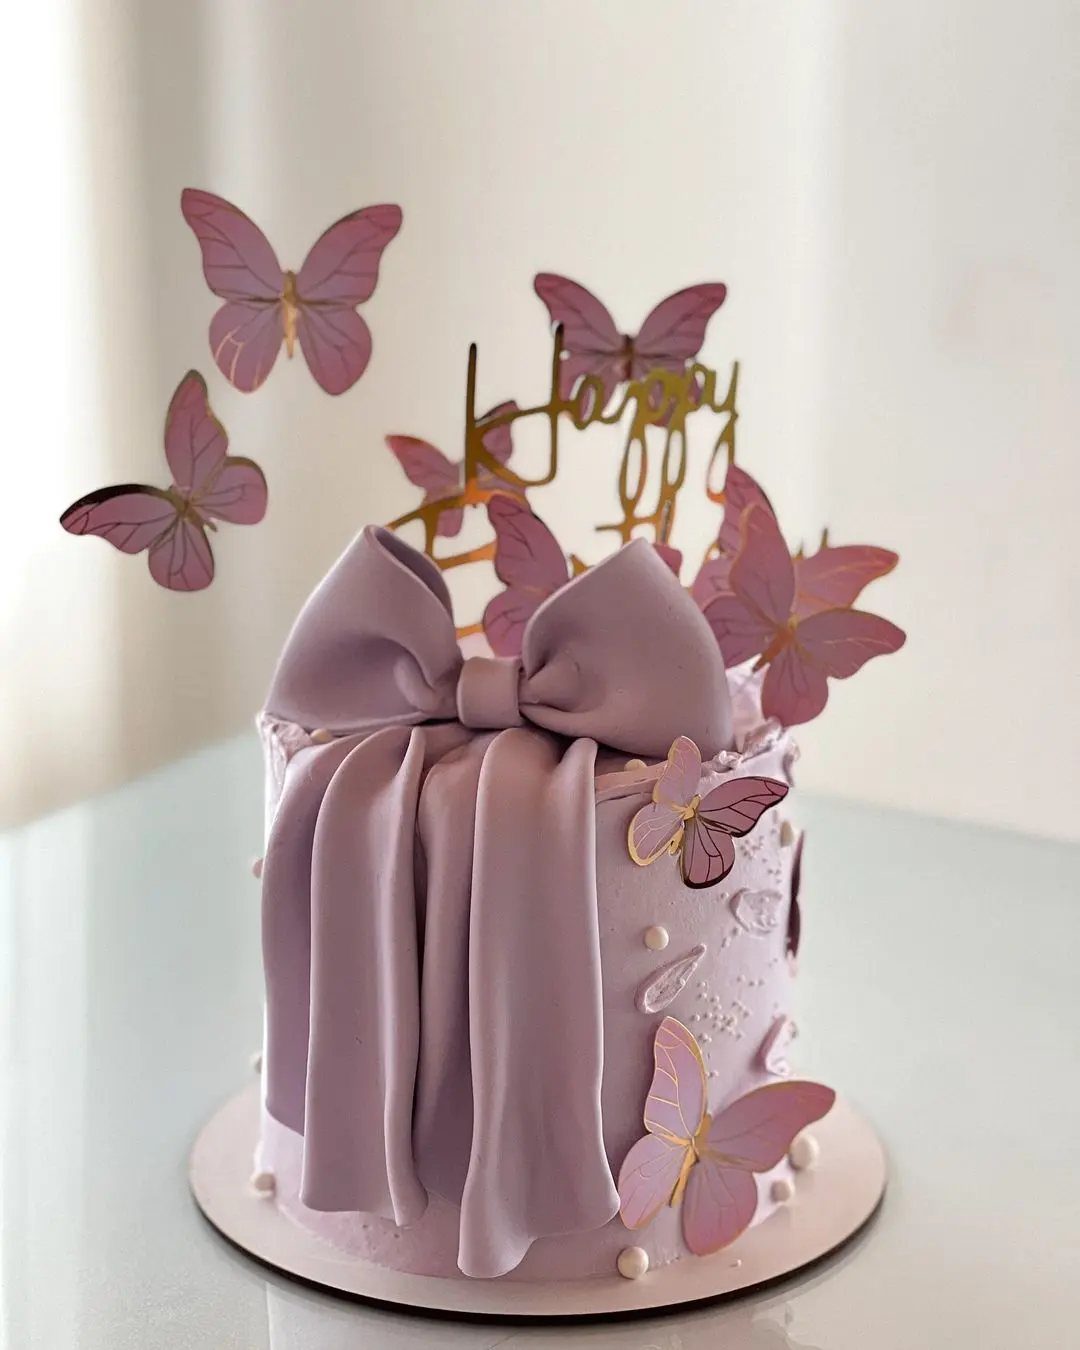
Lavender frosting makes purple butterflies and a big fondant bow look deliberate. Keep the cake body smooth and one shade so the decorations stand out.
I’d buy the butterflies, since gold-edged ones are tedious to paint by hand. For the bow, store-bought fondant in a slightly deeper purple saves tinting, and you can make it a day ahead so it holds its loops.
Set the bow last, off-center on top, and tuck the butterflies around the sides at different heights.
16. Royal Heart Shaped Cake
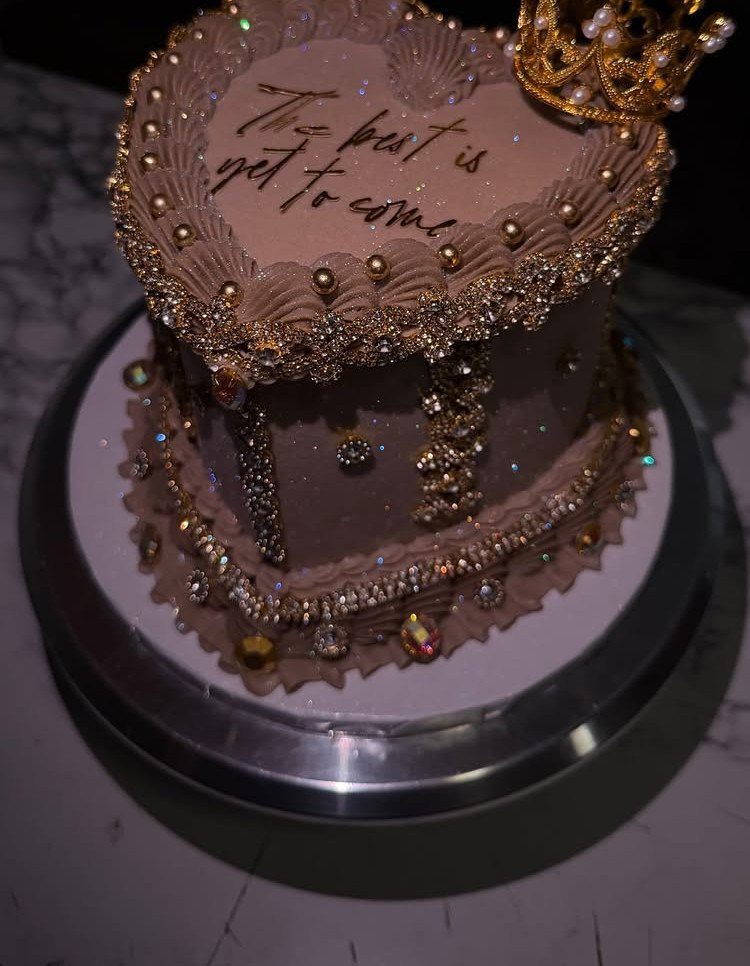
A heart pan, a brown frosting and a handful of gold make this one look regal. The gold beads and tiny crown do the royal work, so the frosting underneath only needs to be even.
Gold edible beads and jewels are sold ready-made, which beats shaping them. I’d press them along the piped border at regular spacing, then set the crown in the center last.
Write the message, such as "The best is yet to come," in a short, simple line, because lettering is the hardest thing to fix.
17. Potted Plant Birthday Cakes
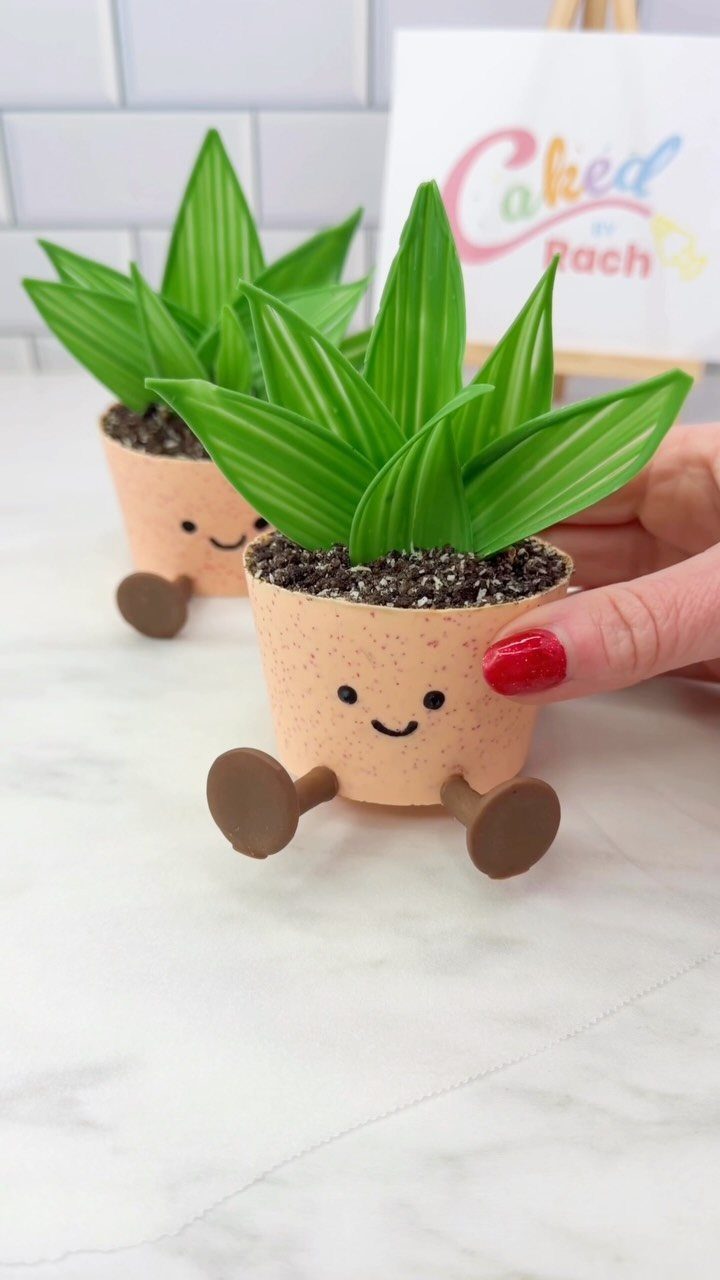
Small cakes shaped like smiling potted plants are one of the friendliest ideas here, since each guest gets their own. Bake in small round pans or cups, frost the "pot," and top with green fondant leaves cut in pointed shapes.
Store-bought green fondant spares you tinting. Cut each leaf, pinch it at the base, and let them firm up for a day before pushing them into the top.
Draw the face with a food-safe edible marker. A dot-eye smile reads clearly and forgives a shaky line.
18. Gold Bar and Coin Cake
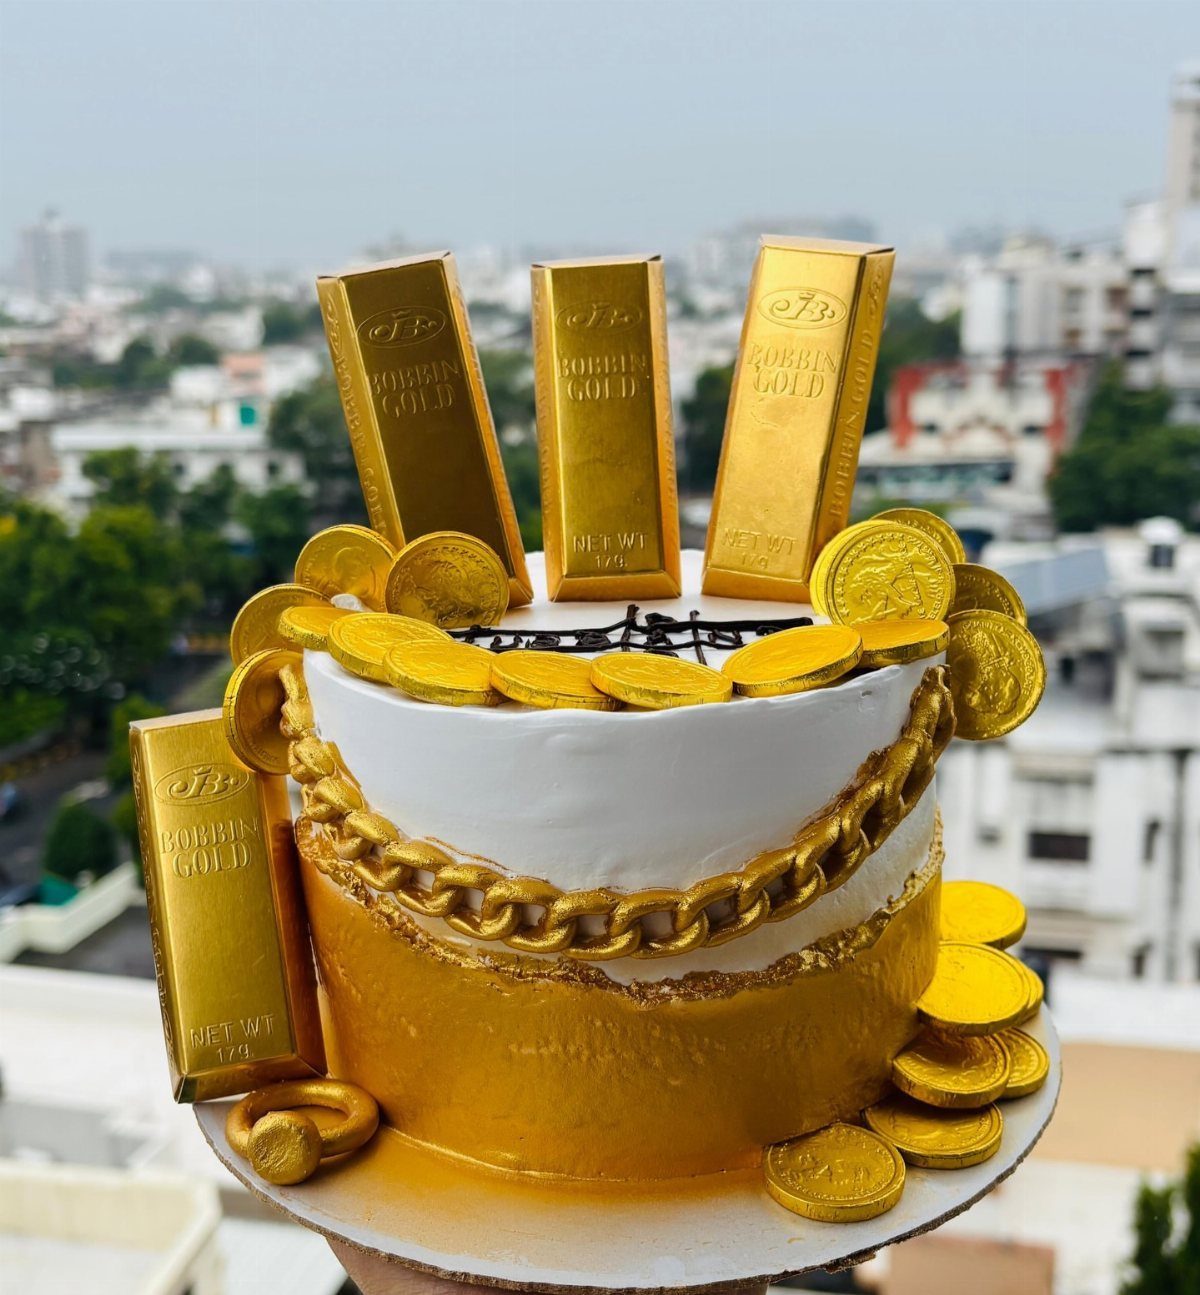
Gold bars, coins and a chunky chain turn a white cake into a money cake, and the gold is mostly bought rather than made. Edible gold bars and coins come ready-made, so your work is a smooth white finish.
I’d drape the chain around the side and stack the bars and coins in a loose pile on top. Plan the chain before frosting, because it pulls on soft frosting; chill the cake first so it stays put.
Keep the name or label small so the gold takes over.
Beginner-friendly Decorating Tips
Soft, uneven shapes are a style in themselves, and pastel flowers are the best example.
For quick petals, dollop stiff buttercream on the cake and press the back of a spoon into it, then pull sideways so each swipe curls into a rounded edge.
They don’t have to match, because the loose, painted look is what you want.
Thick icing matters here. A thin or warm batch slumps before the petals hold their curve, so chill it for a few minutes if it softens.
For a first cake, pick the technique that tolerates mistakes and skip the one that shows every slip. Spoon-pulled petals forgive almost anything, and you can scrape a bad patch off and try again.
Personalization Techniques
A blank grocery store cake is a perfectly good starting point.
Add a simple pattern such as hearts, polka dots or stars, then finish with a short, sweet message on top. That small step turns a plain cake into one made for a particular person.
Candles carry more weight than most people give them. One or two fancy ones make even a basic 13×9 sheet cake feel like an occasion, and they cost almost nothing.
Choose the pattern from something the guest of honor already loves, such as a favorite shape or color, and the cake will feel personal.
Use of Natural Decorations
A simple white cake is the best canvas for fruit and flowers. Both bring their own natural color, so you can skip food coloring entirely if you’d rather not use it.
Edible flowers such as pansies or rose petals suit spring birthdays especially well. They work on a homemade carrot cake just as easily as on a grocery store cake, so a store-bought base is no handicap.
Stick to flowers you know are edible, such as pansies or violets, and keep the count low; 5 or 6 blooms are plenty for a standard 8-inch cake.
A handful of pansies or a scatter of petals looks deliberate, while a crowded top starts to look messy.
Frequently Asked Questions
What are the newest trending cake designs and ideas?
Colorful, whimsical designs lead right now, with unicorn cakes and chaos cakes named as the latest trends.
For a unicorn cake, buy the horn and ears ready-made, because those are the pieces that are hardest to sculpt, then pipe a tinted buttercream mane onto a pastel base.
Chaos-style piling on is close to maximalism: ruffles, sprinkles, ribbons and toppers crowded together, held in check by keeping the colors in one bright family.
What is an easy birthday cake design for a beginner?
Sprinkles, fresh fruit and spoon-pulled buttercream petals are the most forgiving choices. A ring of fresh berries covers rough frosting entirely, and a band of sprinkles pressed into the sides of a white cake takes about a minute.