These ideas run from a single patterned tablecloth and a bag of sprinkles to a chocolate fountain, a donut wall, and a funfair-style treat machine station.
Sections near the end give measurements for the cloth, including how far it should hang over each edge.
1. Themed Treat Table
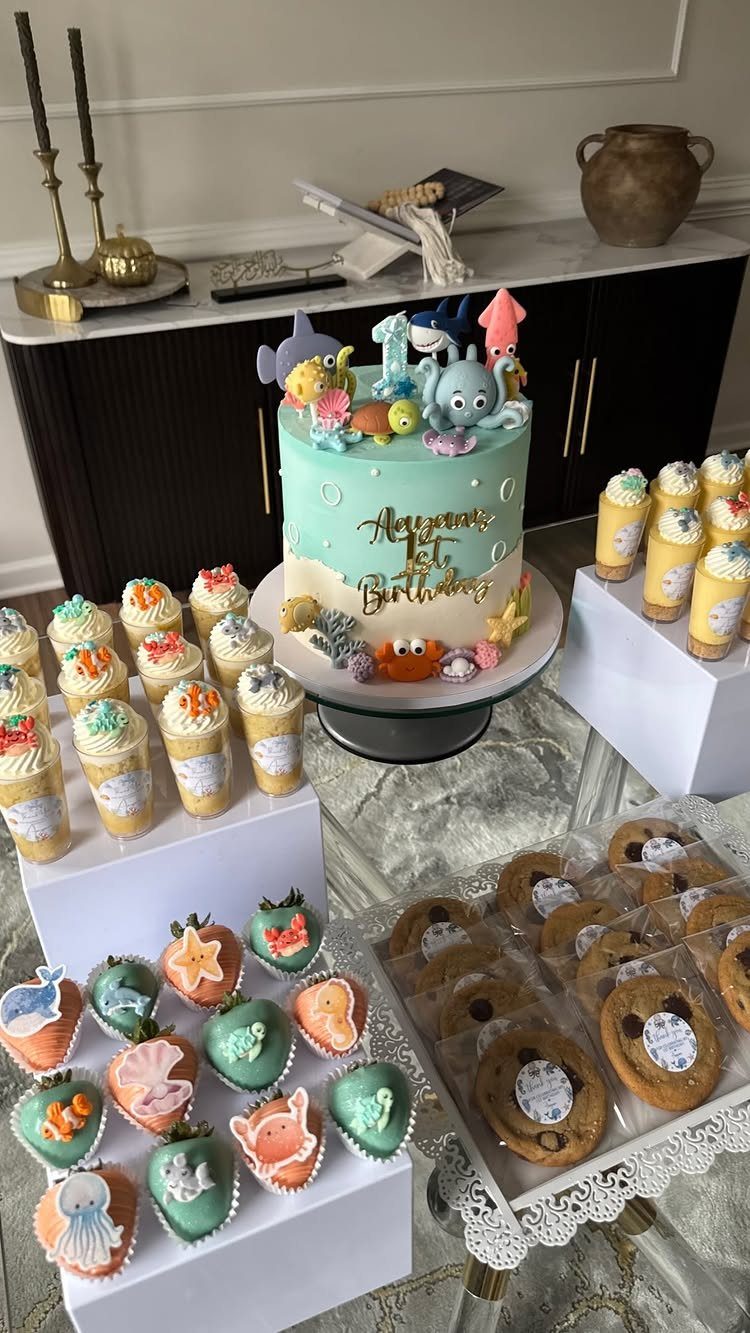
An ocean theme gives every item on the table a job: blue frosting, cupcakes in sea colors, strawberries dressed up, cookies to match. Pick the theme before you shop, and the list nearly writes itself.
I would put the cake on the highest spot, with the cupcakes and cookies fanned out around it so the name on the cake reads from across the room. Store-bought cupcakes and cookies work fine if you decorate them yourself.
2. White on White Elegance
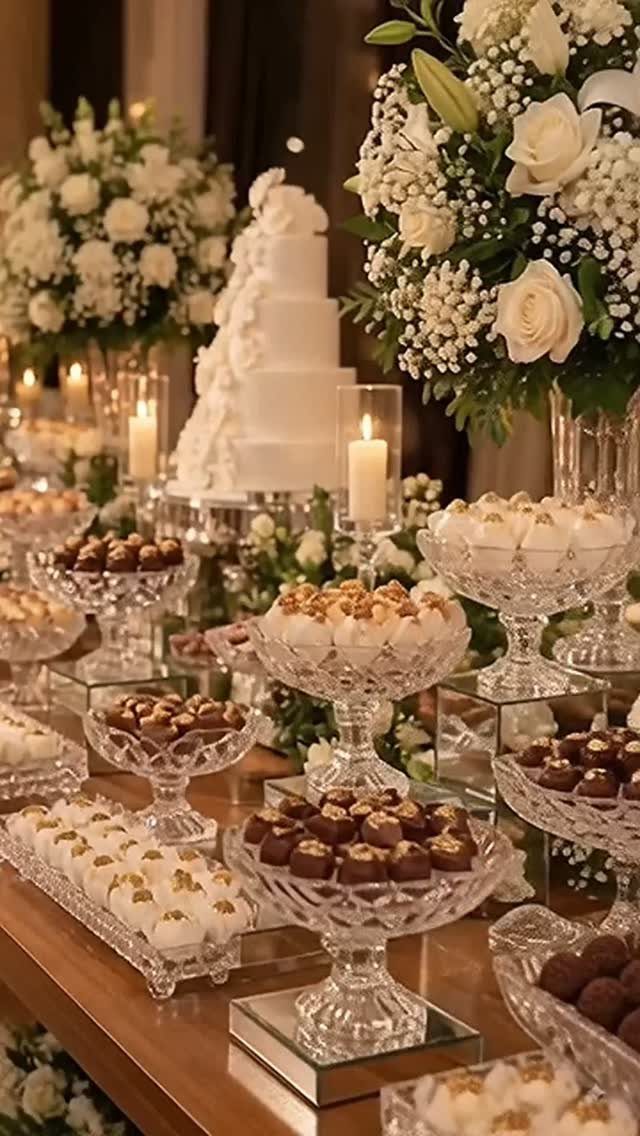
Candlelight does half the work on a white table, so set the candles out before anything else.
A tiered cake in the center, truffles and small sweets in glass or crystal bowls, and white flowers in between keep the display calm and a little formal.
Bowls are the budget move here: they hold loose treats without needing a dozen separate stands. A few chocolate pieces in the mix give a white table all the contrast it needs, so a second color isn’t necessary.
3. Colour-Coordinated Dessert Table Display
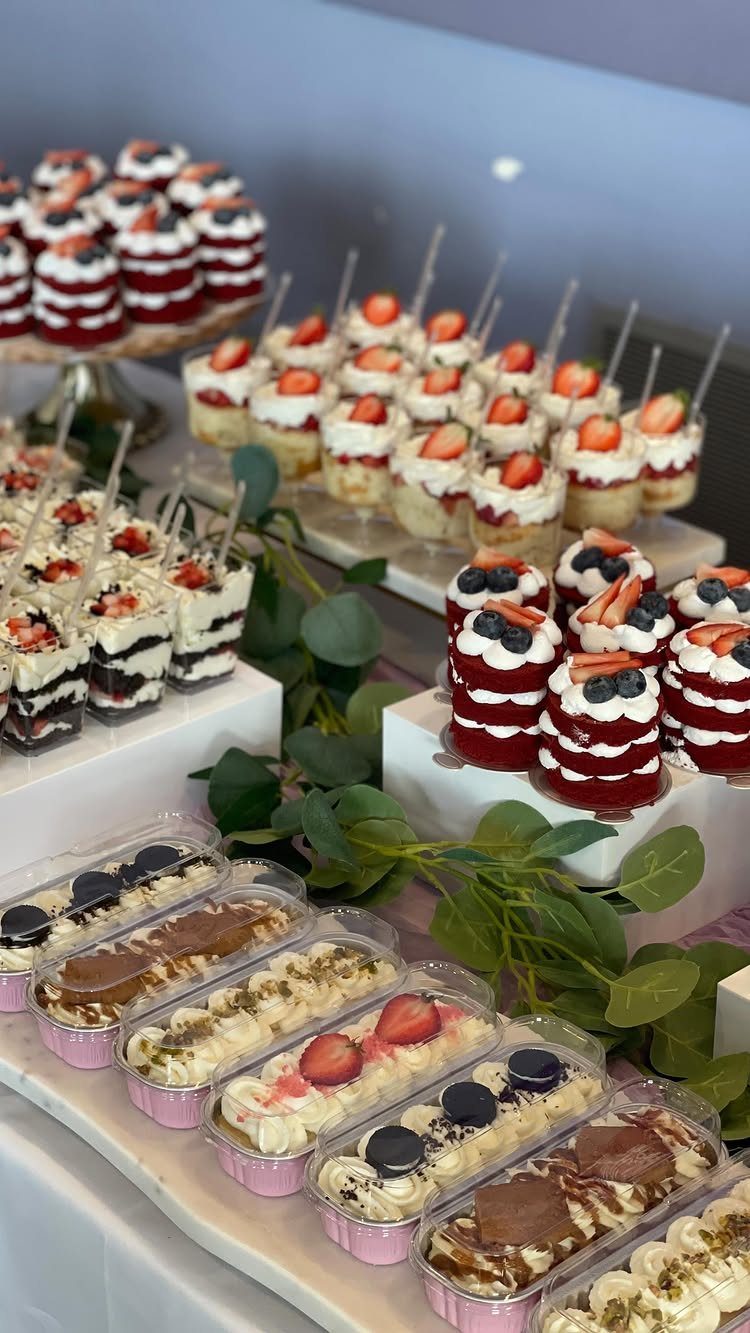
Two or three colors, held firmly, make a modest spread look planned. Red and white with green leaves is a good example: the greenery counts as a color, and it costs very little.
Choose desserts that already fit the palette, like red velvet and strawberry parfaits, instead of dyeing everything.
White stands and a white tablecloth keep the food as the only color, so the table stays tidy even if you buy half of it.
4. Sweets and Florals
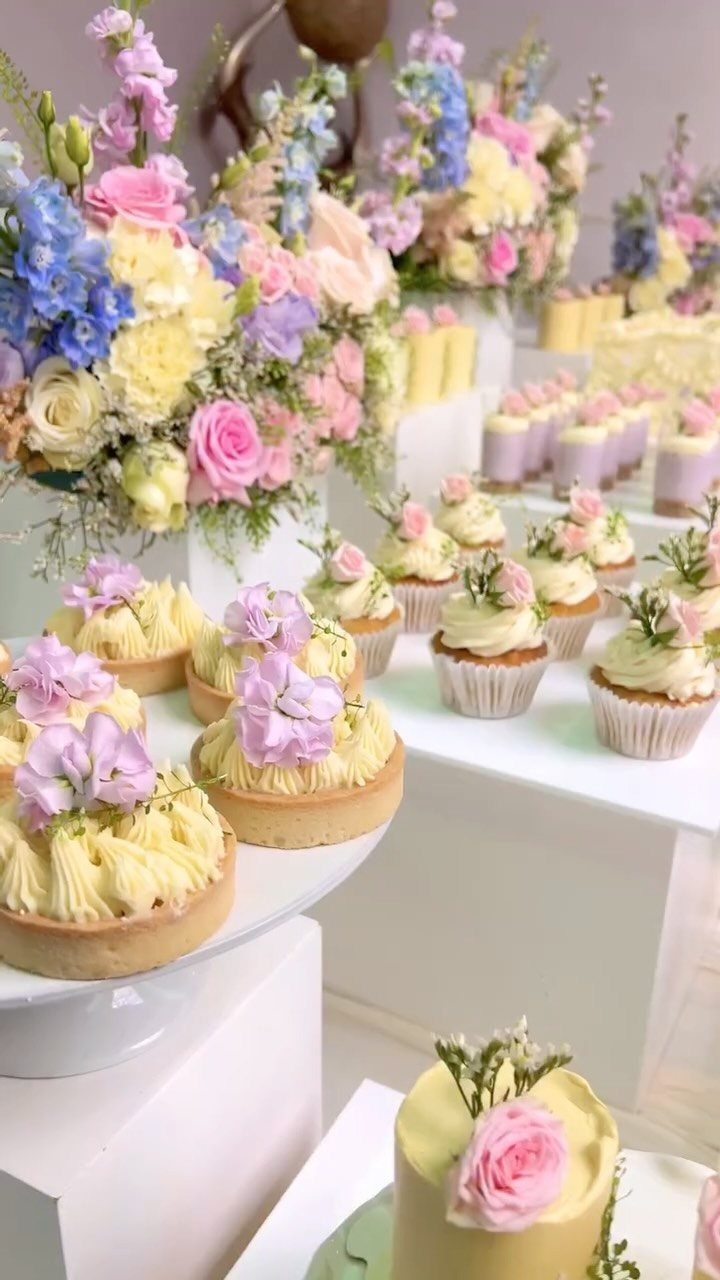
Fresh flowers do the decorating, so the desserts can stay simple: small tarts, white-frosted cupcakes, one little cake with a rose on top. That is a good trade for anyone short on time.
I like picking flowers in two or three shades that echo the tart toppings, so the sweets and blooms read as one set.
Keep arrangements low and set them between the plates, not in front, so guests can still reach the food.
5. Pink and Gold Dessert Table
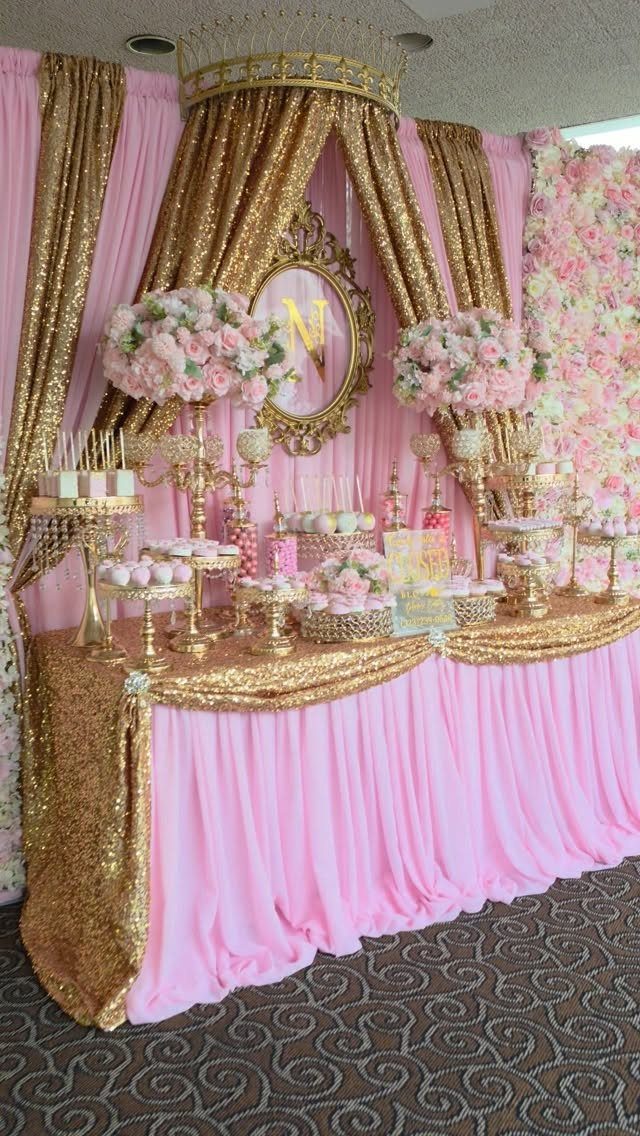
Hang pink and gold panels behind the table, then add a gold crown and an oval mirror with the birthday person’s initial.
Keep the sweets simple, since the backdrop carries the glamour, and nobody will miss elaborate desserts.
6. Blue and Pink Grazing Table
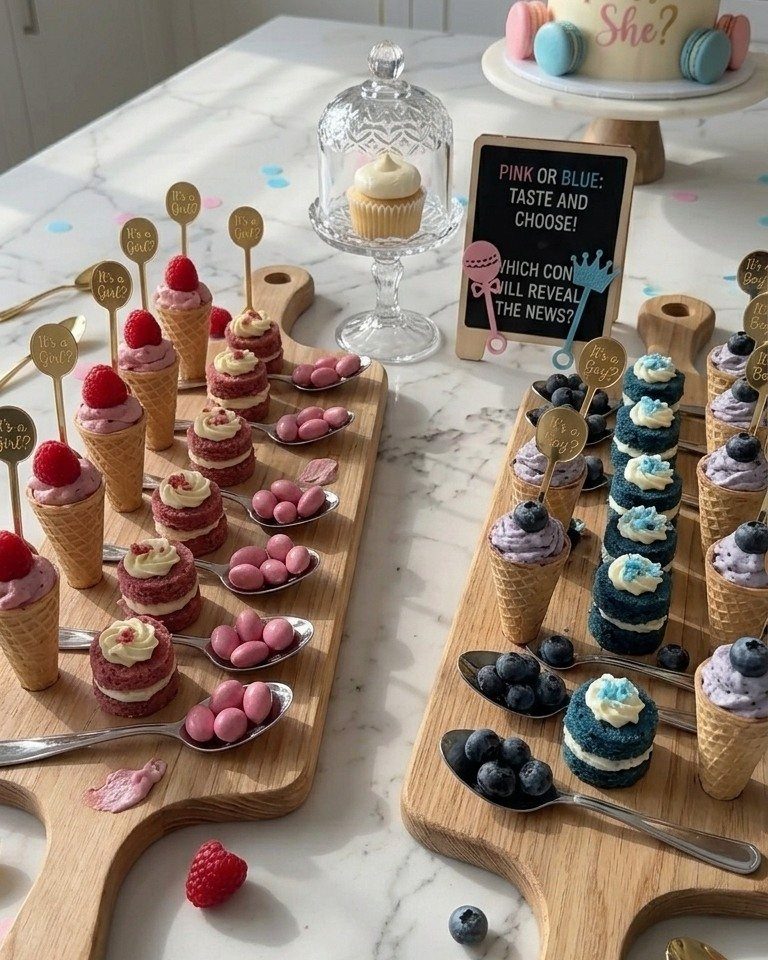
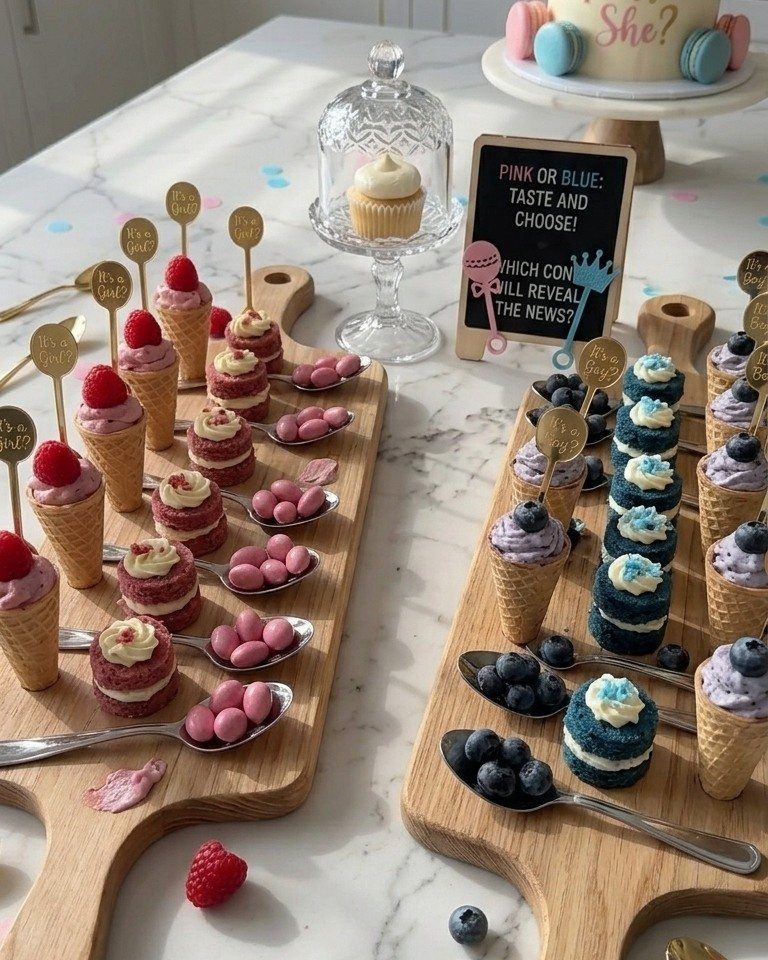
Reveal parties need a way for guests to vote, and a sign saying "Pink or Blue: Taste and Choose!" turns the snacks into the game.
Pink and blue cupcakes with berries on 2 wooden boards make the choice easy to see.
Put a cake with a question on it, like "She?", in the background so the answer waits inside. Boards are easy to refill, and a white counter keeps the colors bright.
7. Mini Cupcakes and Bite-Sized Brownies
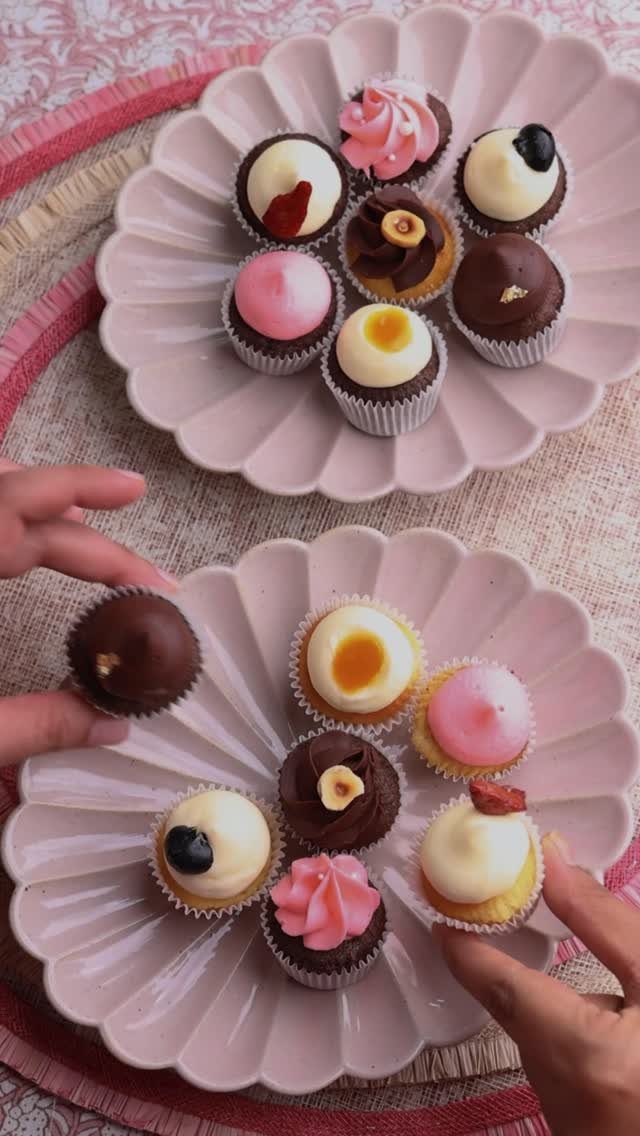
Mini desserts get eaten faster than full-size ones, because a guest can try a cupcake and a brownie without committing to either. Use plates with edges to keep the pieces contained and easy to grab.
Bake or buy both in mini size and fill the plates generously, then refill from the kitchen as they empty. Frosting colors that differ from cupcake to cupcake make a mixed plate look planned without extra work.
Set out multiple plates so guests don’t crowd one spot.
8. Colorful Cupcakes with Sprinkles
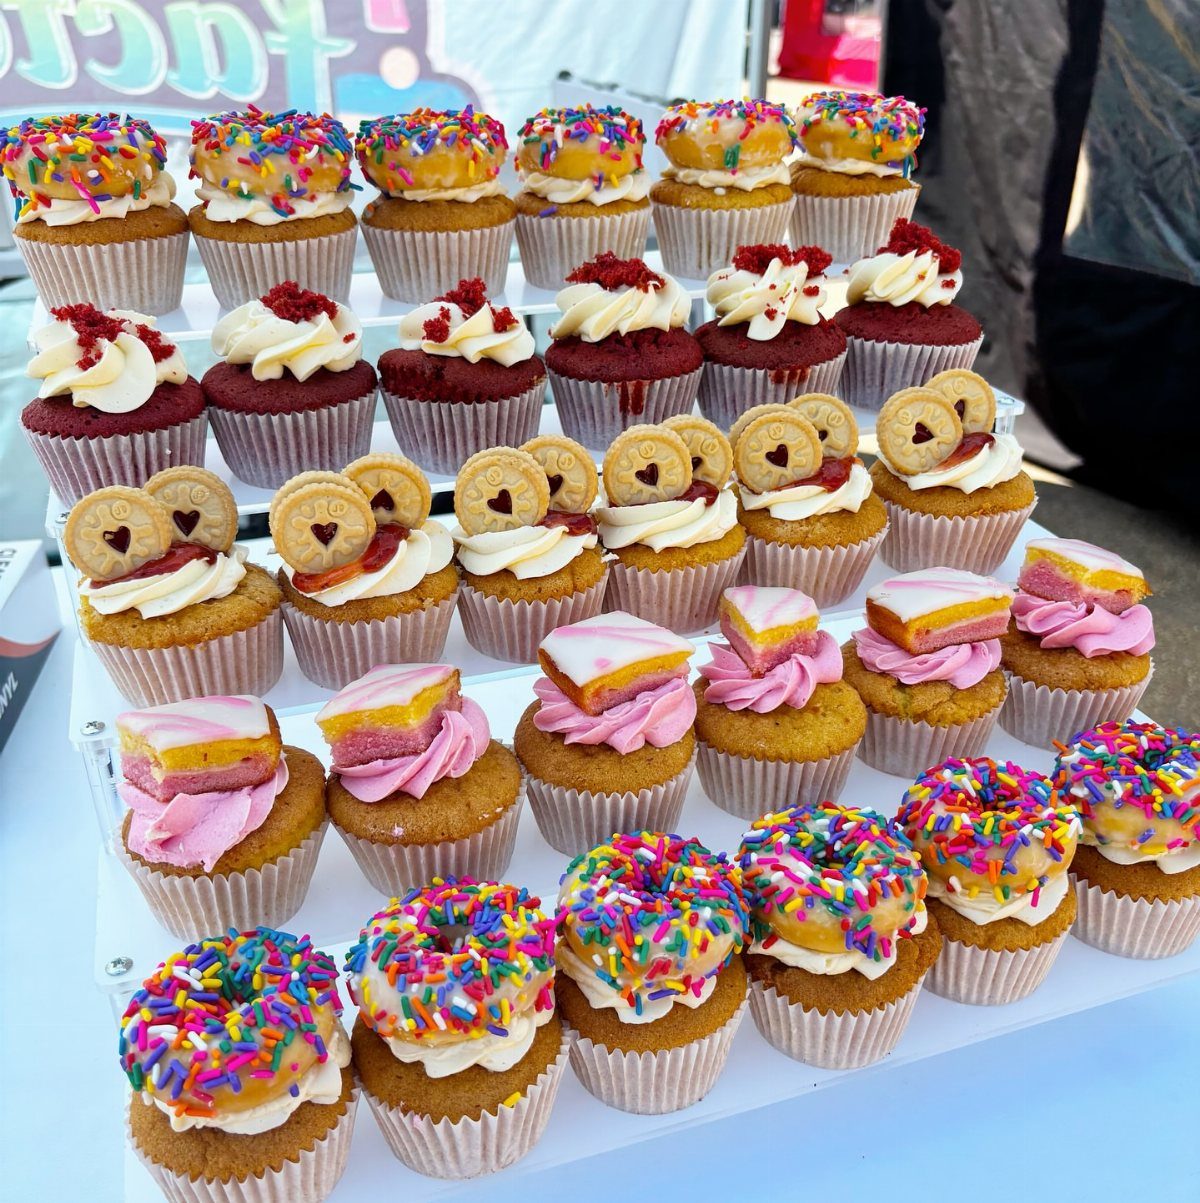
Sprinkles are the cheapest decoration on a dessert table, and a row of cupcakes finished with them looks festive from across the yard.
Rainbow sprinkles, cookie pieces and candy toppings give each cupcake a different look from one batch of plain frosting.
I would buy the cupcakes, or bake a simple batch, and set out bowls of toppings for guests to add themselves.
Red velvet next to vanilla gives some contrast. White trays keep the colors loud, so the table needs nothing else.
9. Open-Air Dessert Table
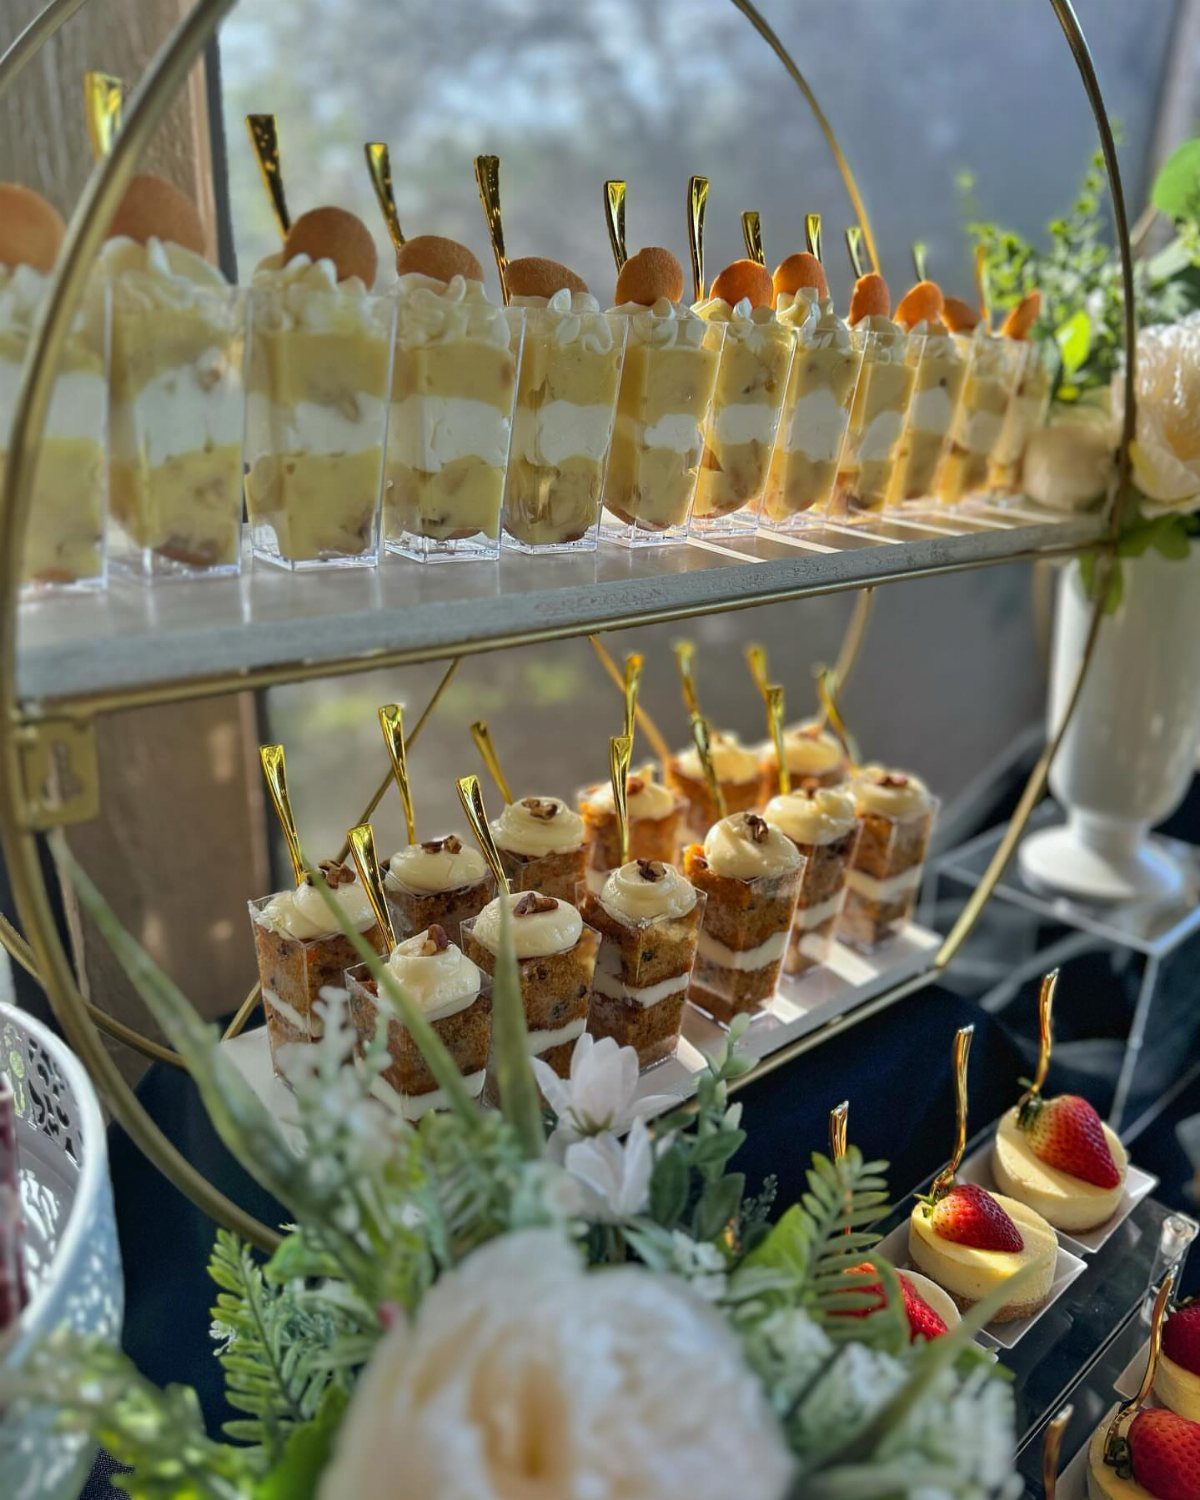
A two-tier gold stand does the work of several, lifting mini parfaits and cake cups so a small table has height. Height is the cheapest way to make a few desserts look generous.
Fill the top tier with whatever travels worst, like parfaits, and put sturdier cake slices below.
White flowers in the foreground add softness, and a low arrangement keeps guests from reaching around it. Individual cups mean no cutting or serving spoons, which suits a host with little time.
10. Light Natural Dessert Table
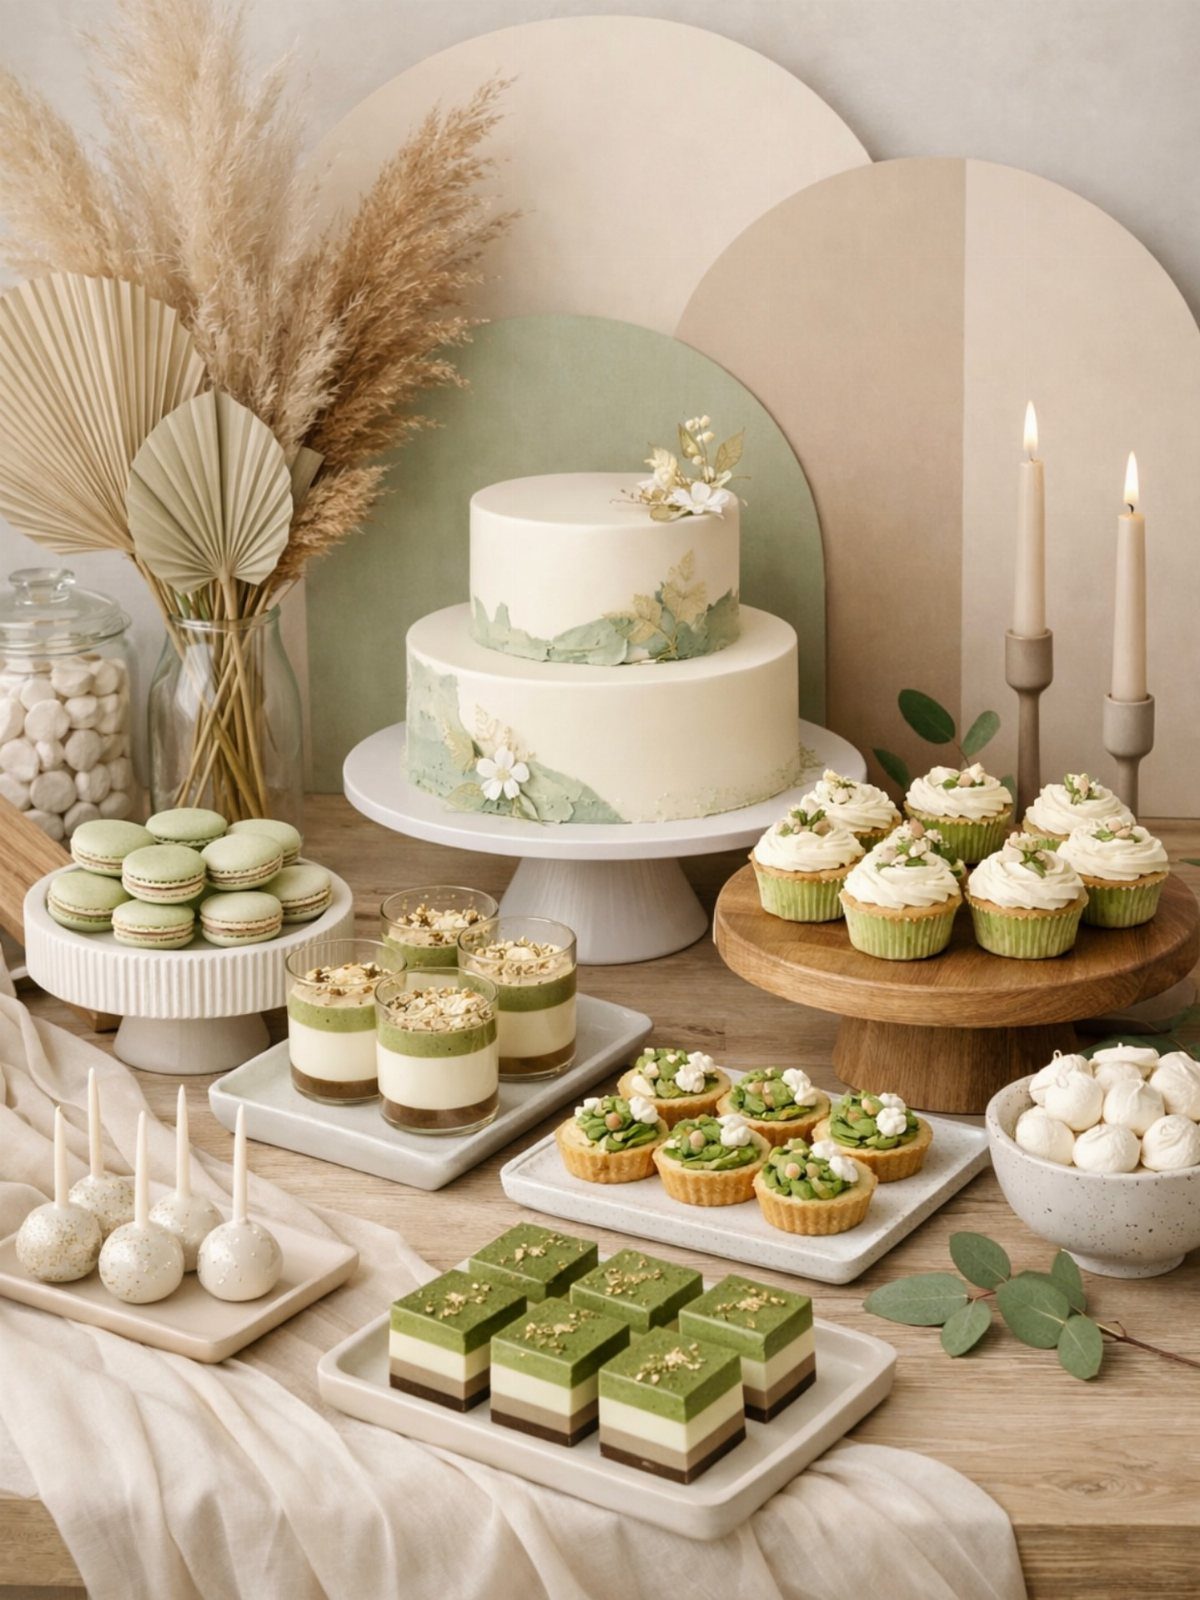
Green and cream is an easy palette to shop for: macarons, mini tarts, cake pops and shooters all come in pale tones, so a mix of store-bought and homemade matches without effort.
I would build the table in layers. Put the two-tier cake in the center, with smaller sweets on either side.
Neutral round backdrops with dried pampas grass behind them set the mood, and the grass never wilts, so you can arrange it days ahead. Candles finish the look; keep them away from the grass.
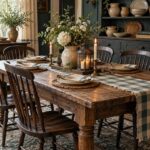
11. Patterned Fabric Dessert Table
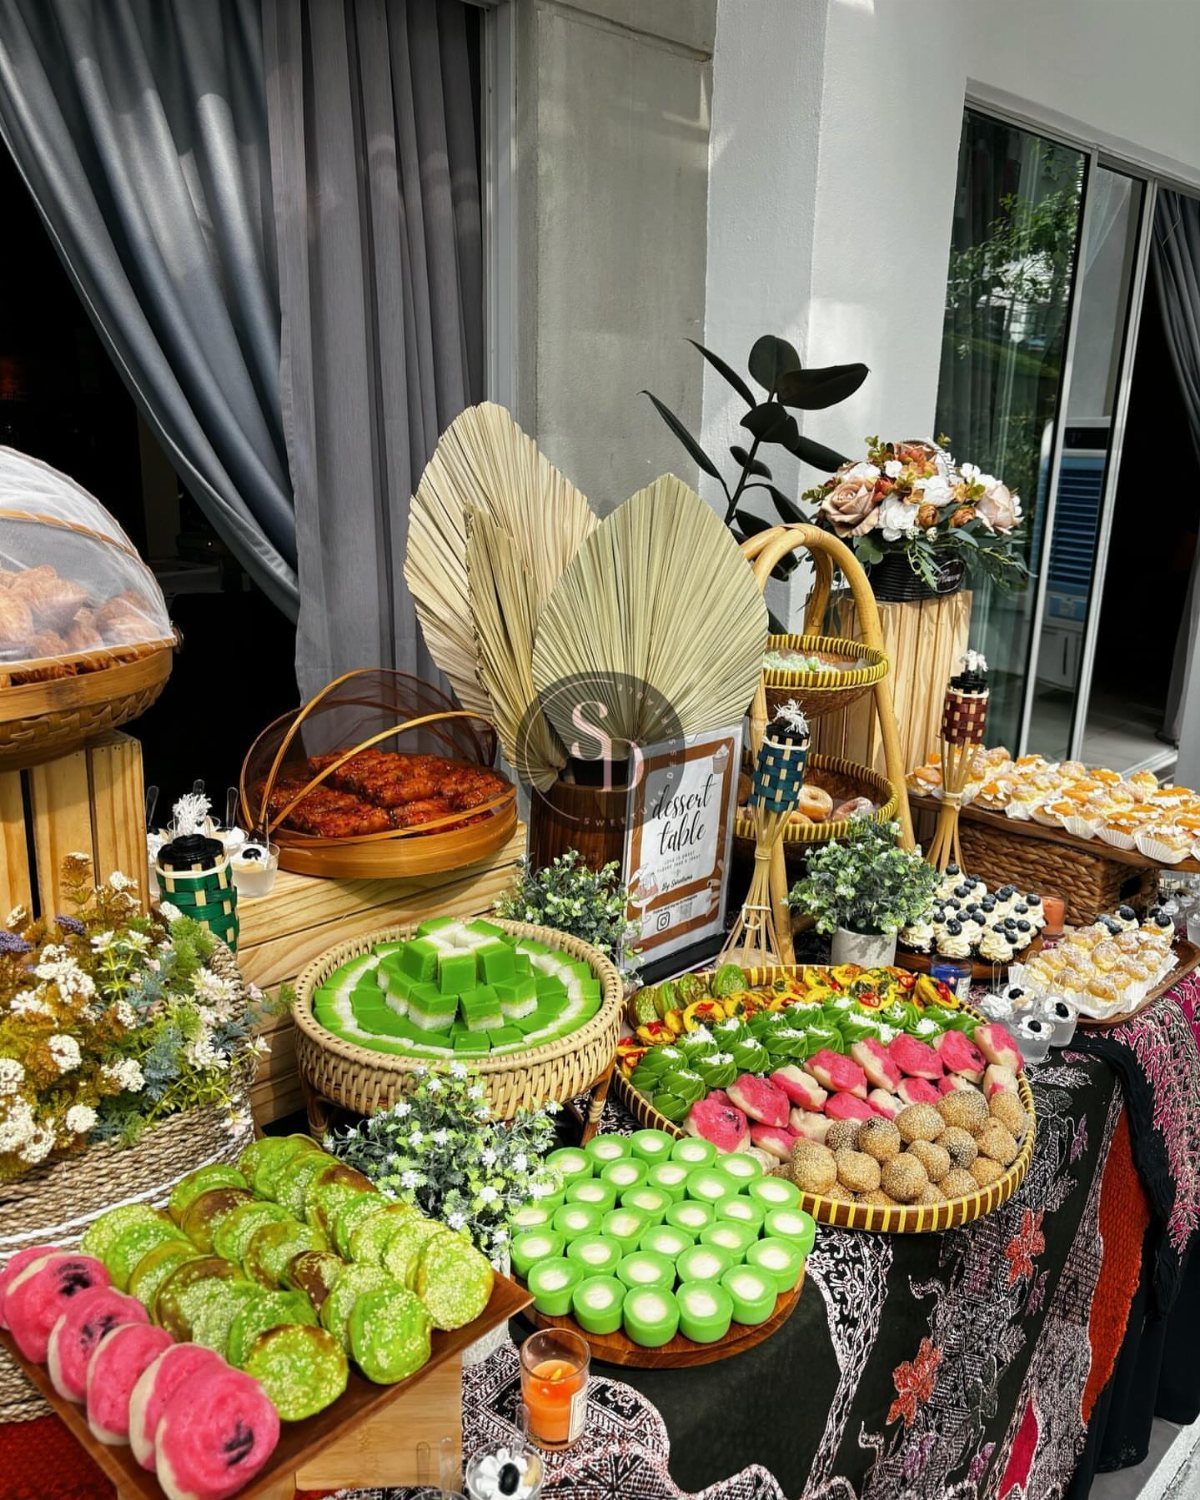
A patterned tablecloth is the fastest way to give a dessert table a point of view. Dark fabric with a bold print makes green, red and gold treats stand out, and it hides spills better than white linen.
Woven baskets hold finger-sized sweets without needing stands, which keeps the cost down.
Pick desserts that echo the cloth’s colors, and add a small "Dessert Table" sign so guests know it’s open. Choose a print with two or three colors, or the food will compete with it.
12. Autumn Blooms Dessert Table
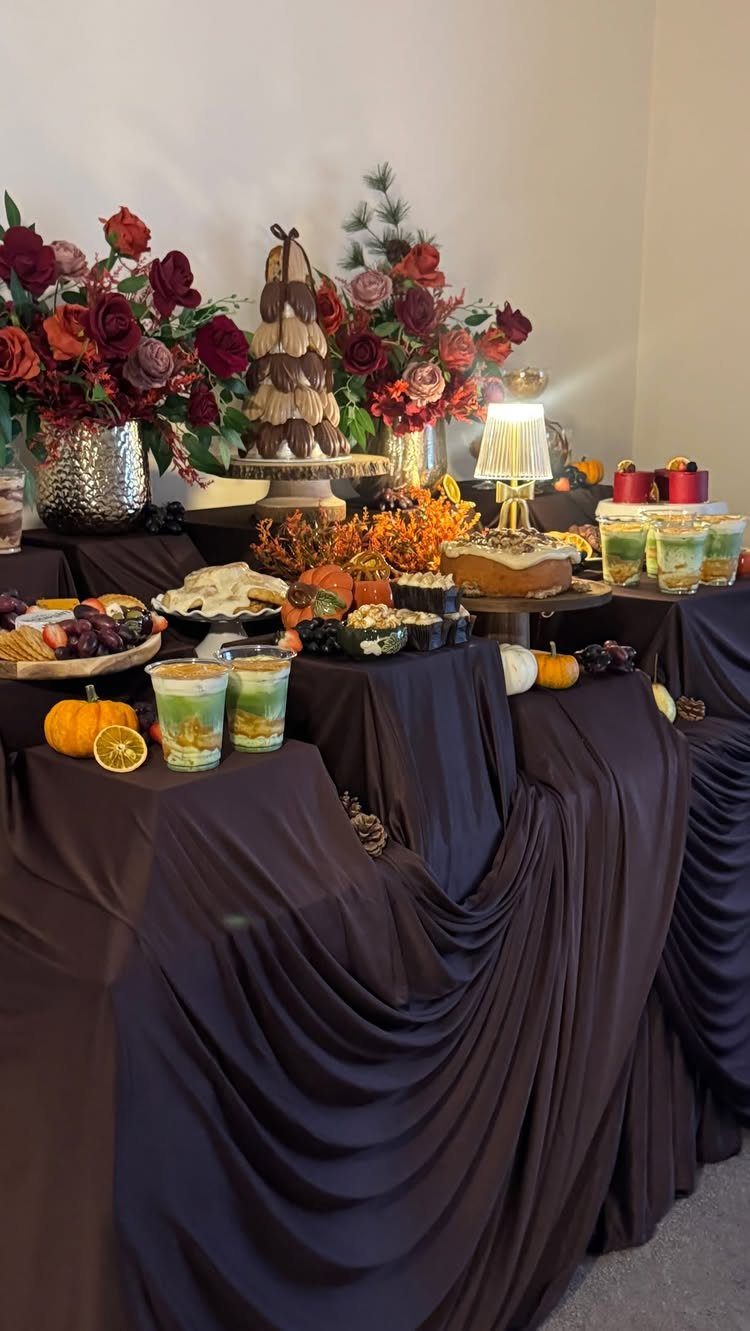
Dark brown linens turn red and orange flowers into the main event, so the desserts can be a simple mix: a macaron tower, a cake, parfaits and fruit. Small pumpkins fill gaps between dishes cheaply.
I would drape the brown fabric in loose folds over boxes or crates to make levels, then place the tallest flowers at the back or the ends. Keep the food at the front, within easy reach.
13. Whimsical Winter Dessert Table
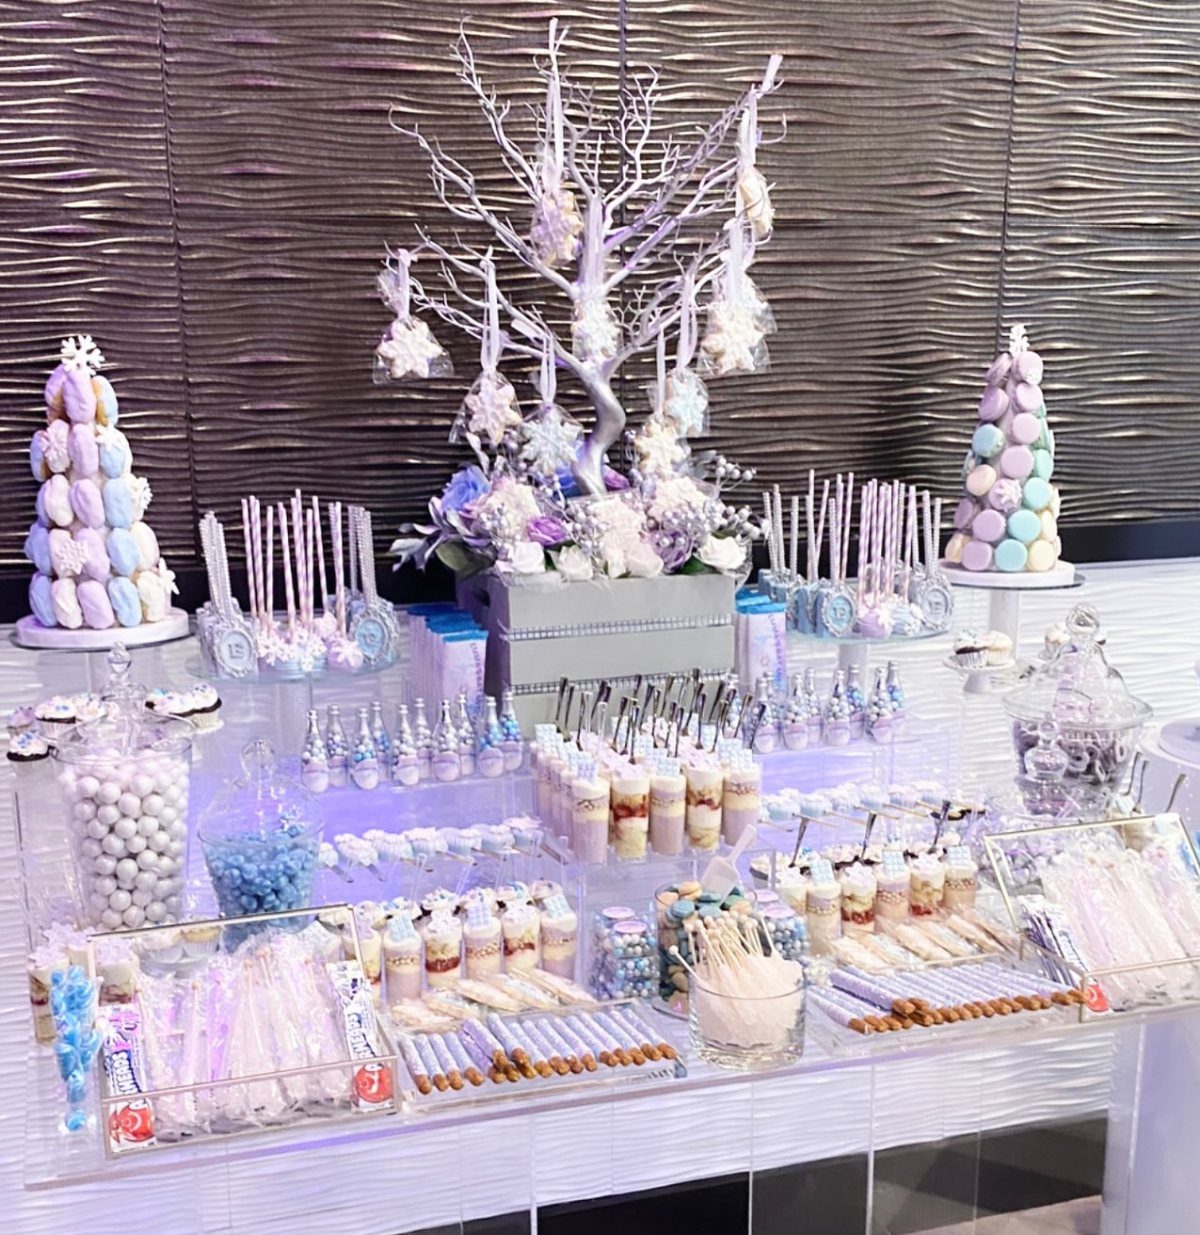
For a winter table, keep the sweets white and pale, like macaron towers and cake pops, and set them against a darker, textured backdrop such as a grey wall or a slate-colored cloth so they stand out.
Keeping every dessert white or near white means a store-bought mix looks planned.
A small white decorative tree adds height without a single extra dish. Set it to one side so it doesn’t block the towers.
14. Chocolate Fountain Dessert Station
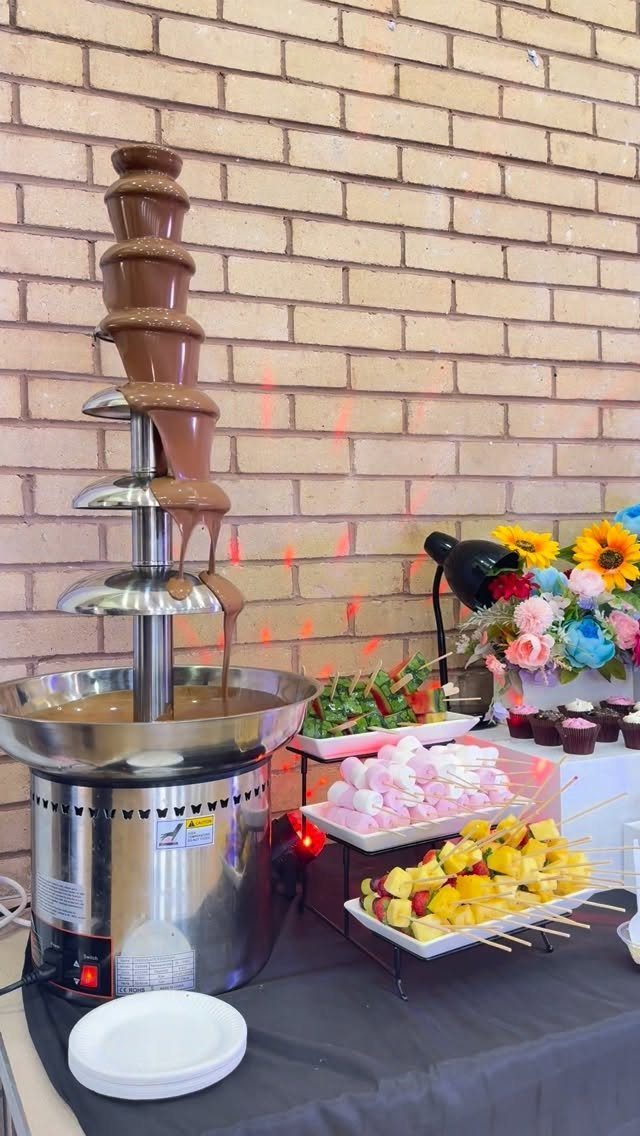
A chocolate fountain turns dessert into an activity, which is why it suits a table of kids. Each child dips their own fruit and marshmallows, so you serve nothing.
I would set the fountain in the center of a dark tablecloth, since drips vanish into black, and ring it with platters of fruit and marshmallows. Cupcakes on the side give anyone who skips the dipping something to grab.
Put the fountain at a height kids can reach and keep napkins close.
15. Ice Cream Bar
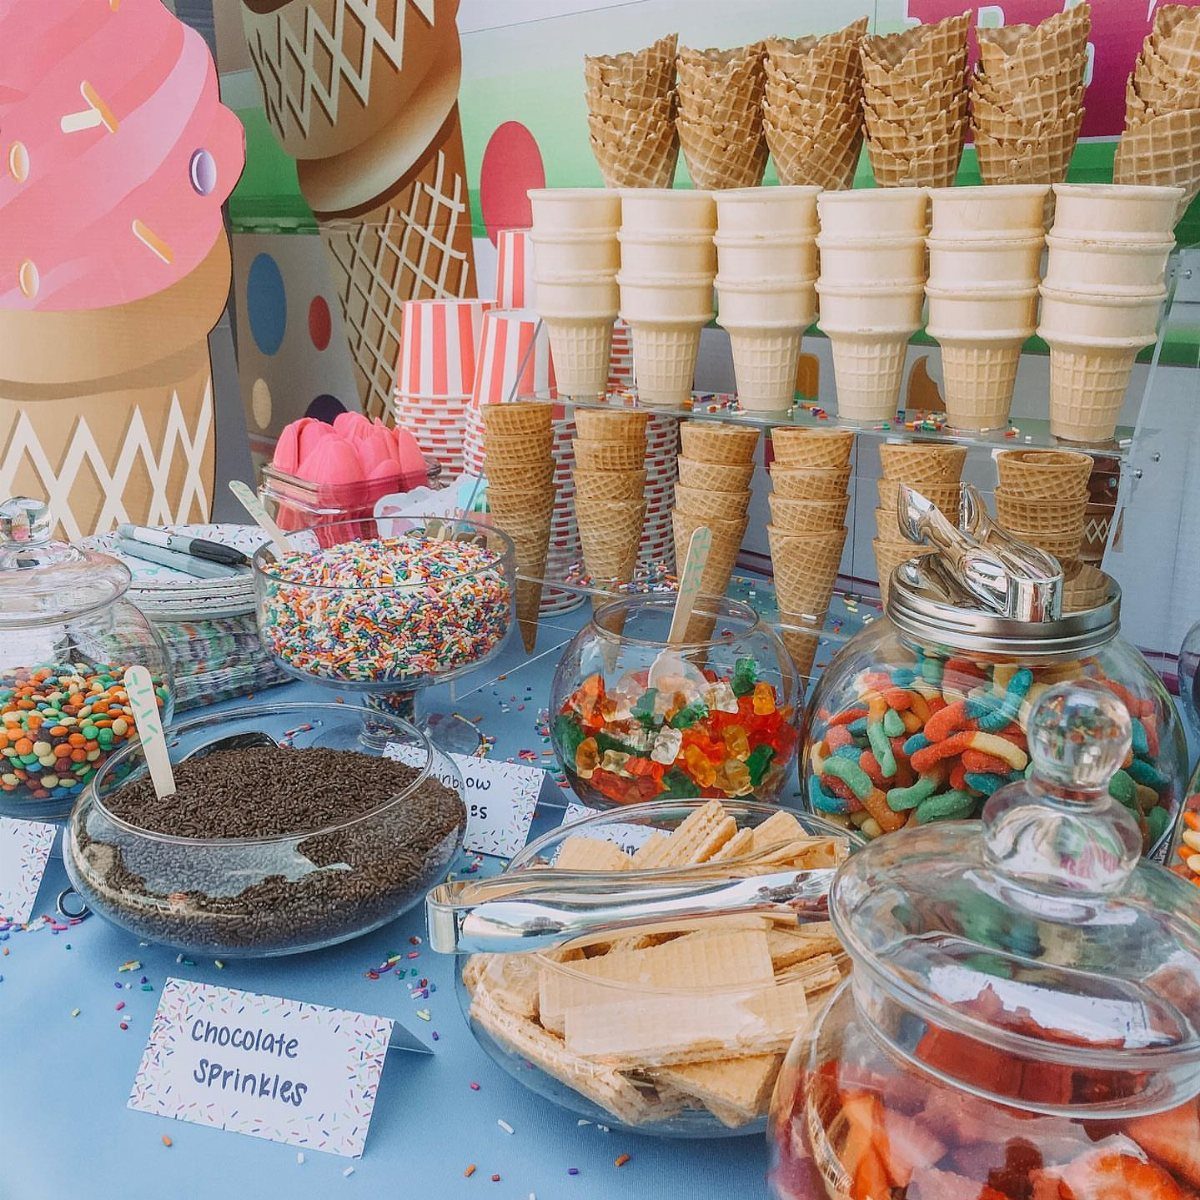
Waffle cones, bowls of sprinkles, gummy worms and wafers let each guest build their own dessert, and that is a real saving for a host short on time.
Label every bowl, the way a "Chocolate Sprinkles" sign does, so nobody has to ask.
Choose a bright tablecloth, blue works well, so the toppings carry the color. Large cone decorations behind the table make the backdrop with almost no effort.
I would add a scoop and a spoon to every bowl.
16. Donut Wall
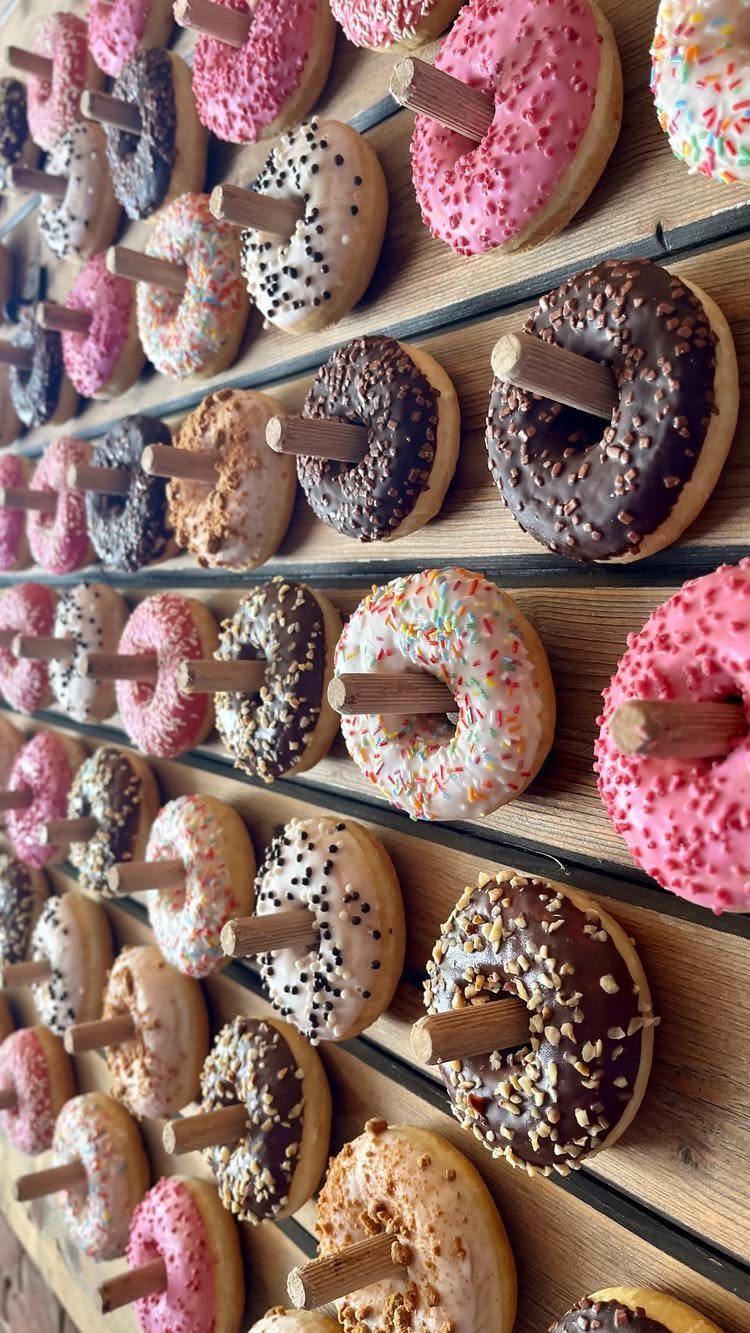
A wall of wooden pegs holds donuts upright, so a dozen look like a display, not a pile in a box. Store-bought donuts work fine, and mixing glazed with sprinkled ones gives the wall variety for nothing.
Fix the pegboard or peg wall to a sturdy surface before hanging anything, and test one donut first. I would hang them just before guests arrive, since the glaze is happiest fresh.
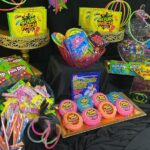
17. Lollies and Candy Table
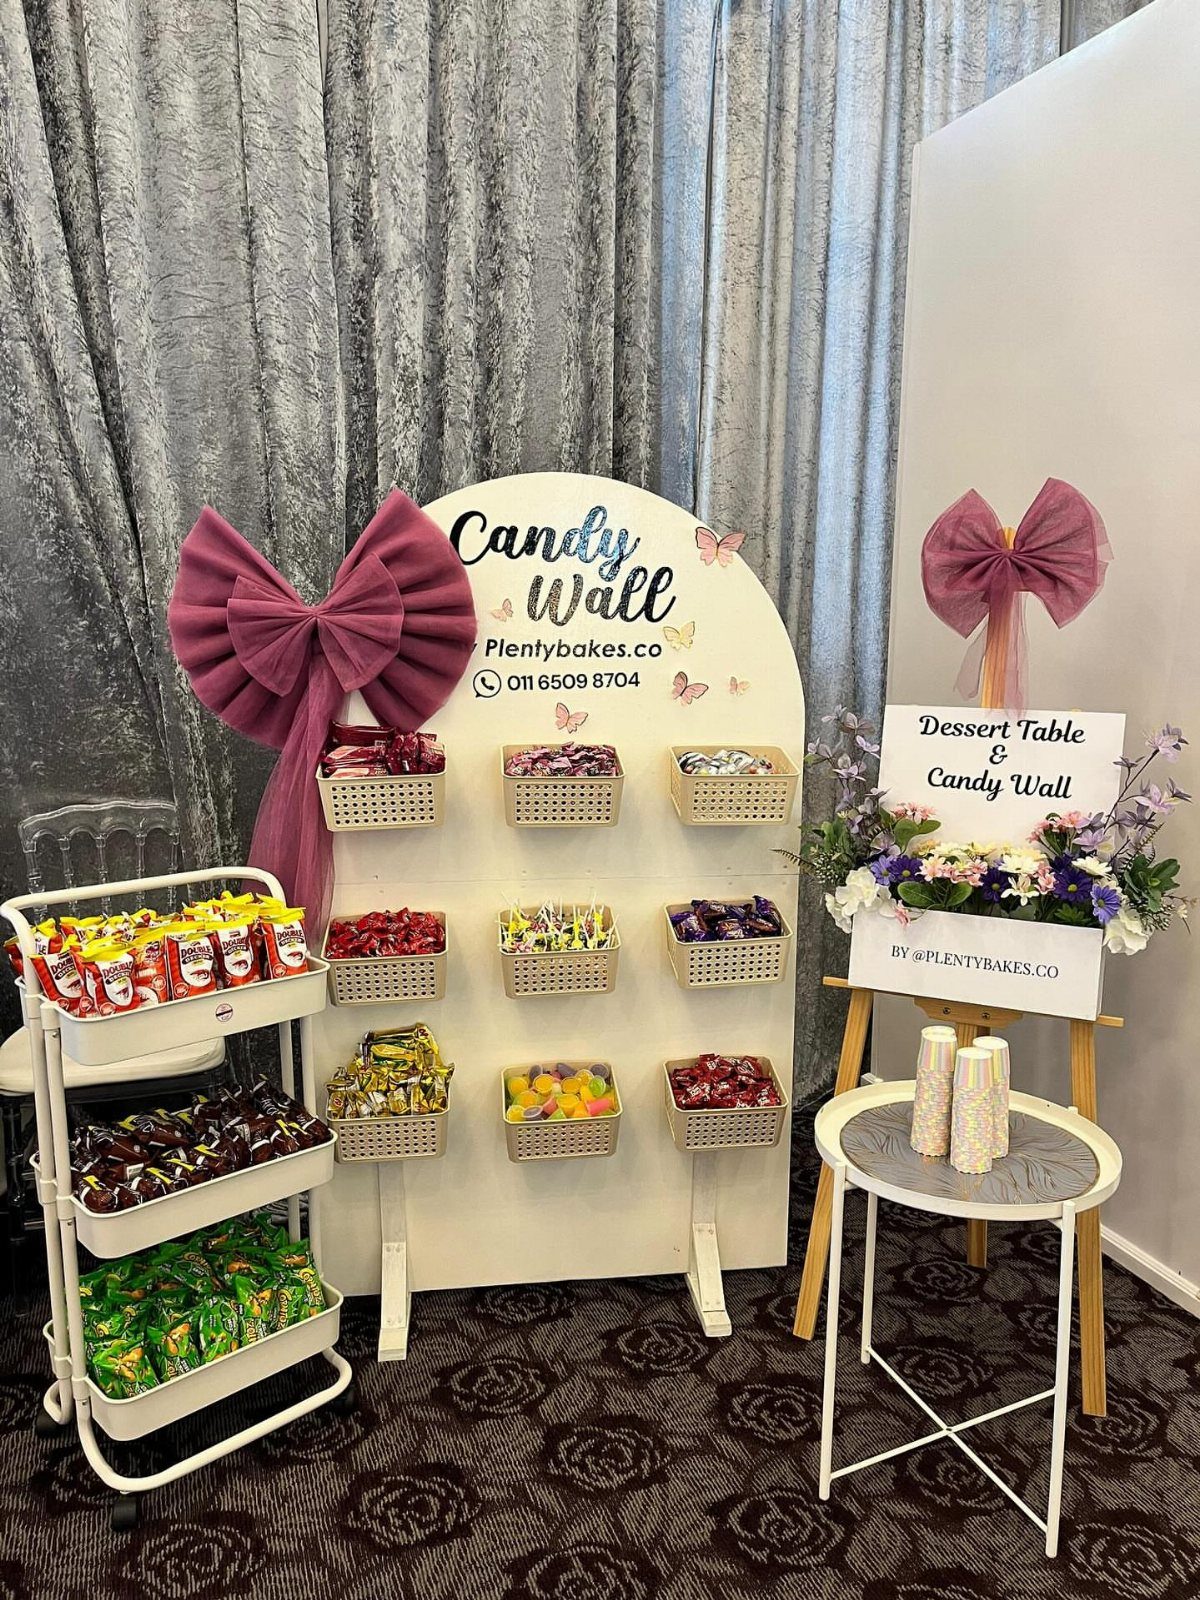
A candy wall packs the most color into the least space: baskets of sweets against a white backdrop, plus a tiered cart for the overflow.
Kids go straight for it, and buying candy by the bag is cheap next to baking.
I like a simple sign, like "Dessert Table & Candy Wall," so the purpose is obvious. Purple bows tie the sweets to the backdrop.
Hand out small bags so guests can take some home.
18. Fairy Tale Pastel Birthday Table
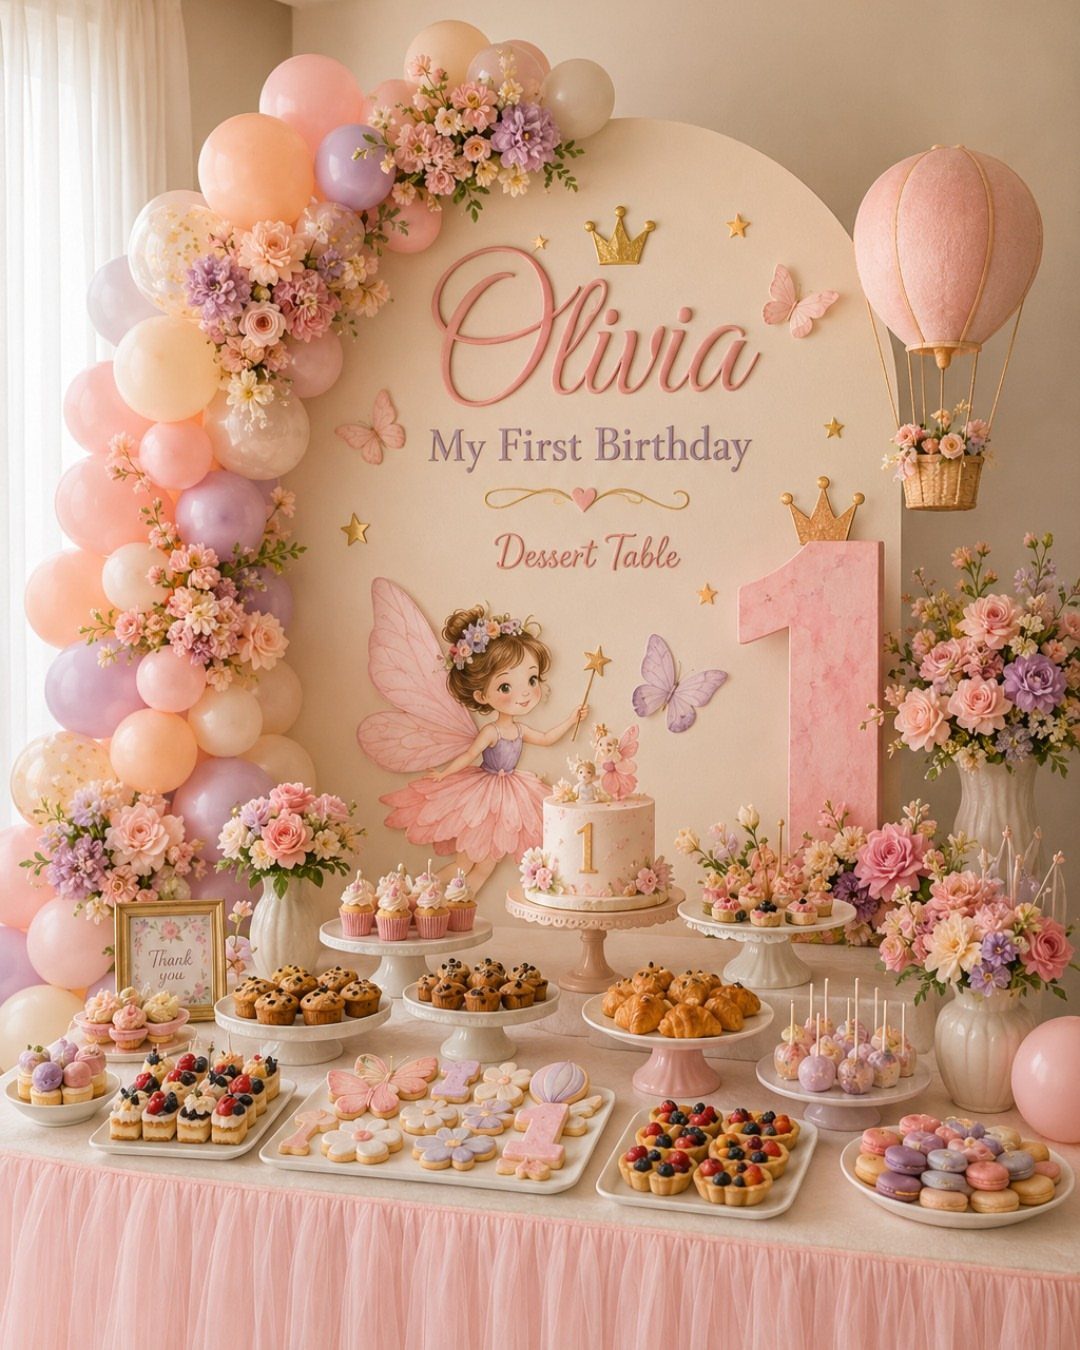
A first birthday table needs less food than decoration, since the guests of honor are tiny and the photos matter most. Pink tulle over the tablecloth adds softness for a few dollars a yard.
Put the name on an arched backdrop with fairy and butterfly art, then set the cake in the middle with cupcakes and cookies on either side. Balloons and flowers fill the corners.
I would keep the sweets simple, since the backdrop does the storytelling.
19. Rustic Wooden Dessert Table
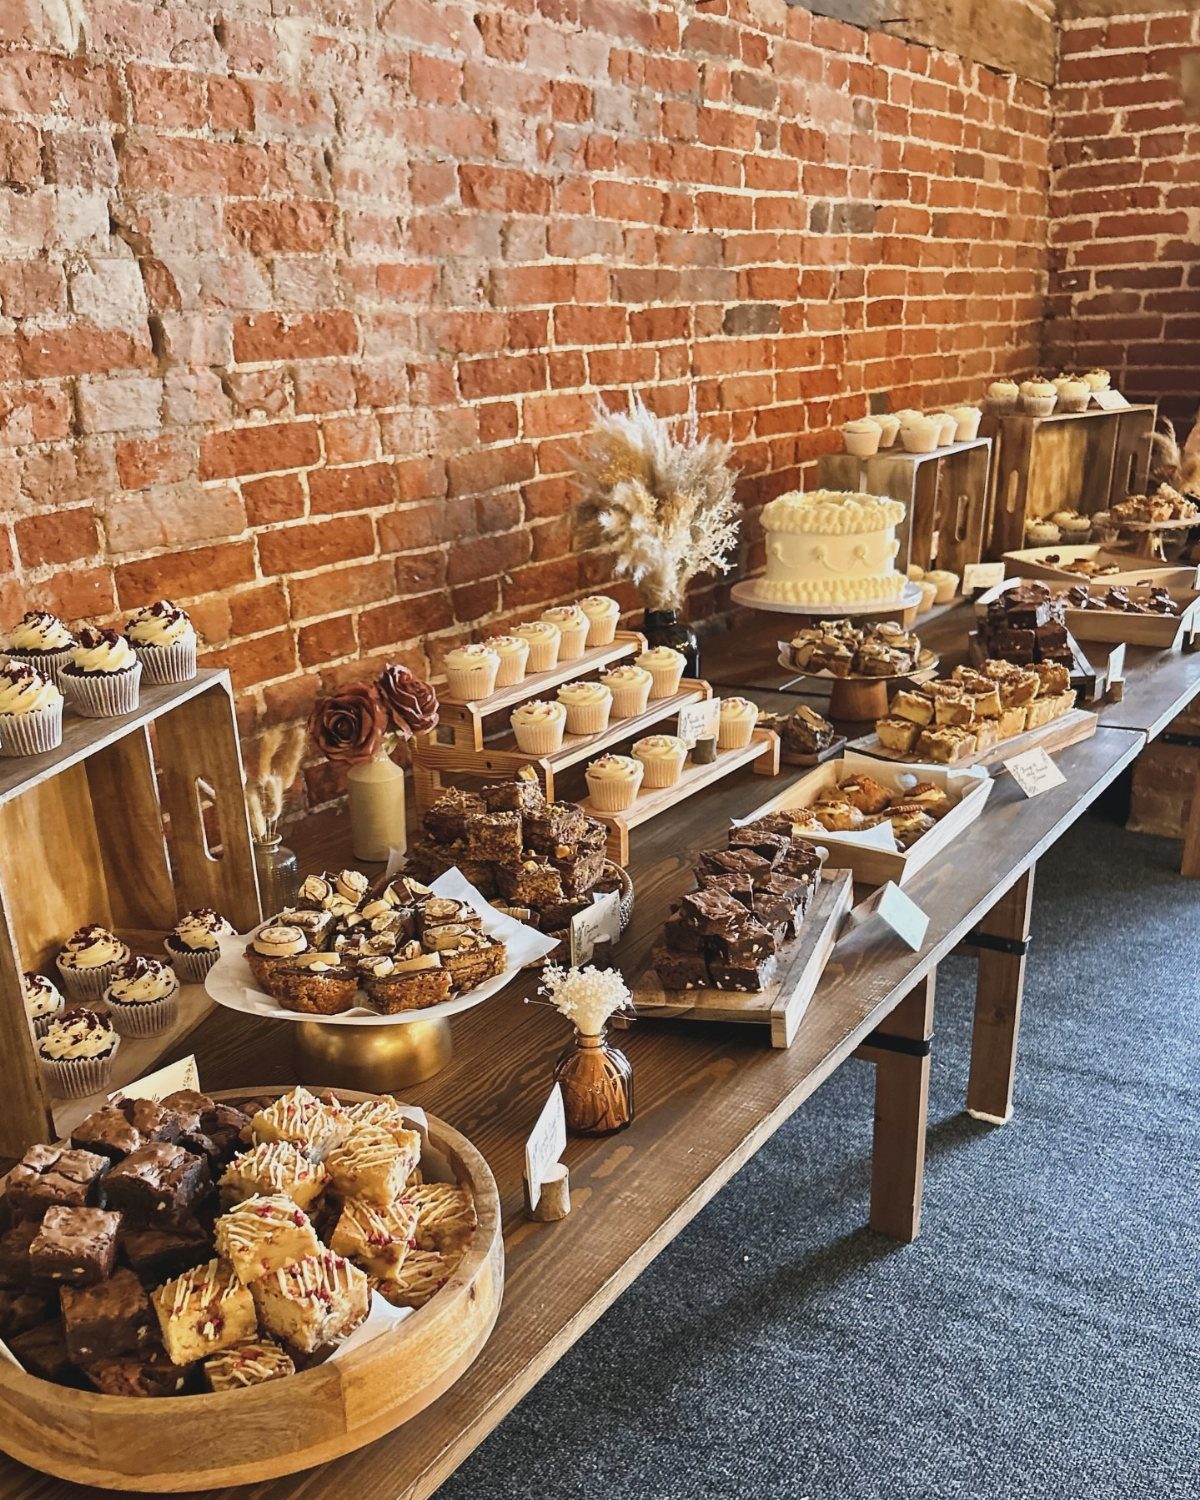
Wooden crates turn a flat table into a set of levels, and that is all a rustic spread needs.
Stand the cupcakes on a crate or two, set the white frosted cake on a board, and leave the brownies on the table at the front.
Against a brick wall, I would keep the frosting white and the colors few. The wood and brick already supply the texture, so extra decoration only crowds the food.
20. Dessert Tower Display
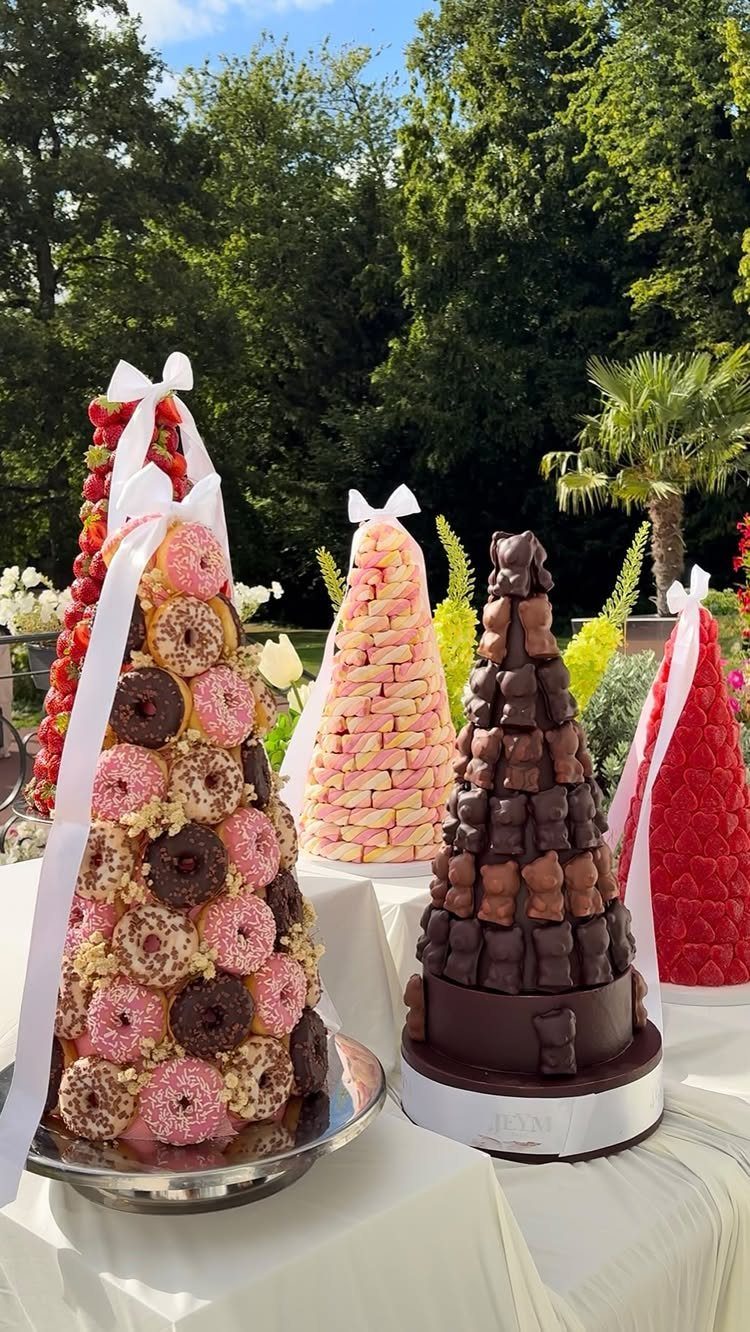
Cone-shaped towers pack donuts, macarons, chocolates and strawberries into a small footprint, so four of them feed a crowd without covering the whole table. Going up instead of out suits a host who is short on space.
Buy the sweets and assemble the towers yourself. I would keep each tower to one or two items so the shapes stay clean, and set them in a row on a white cloth.
Build them close to serving time, since stacked strawberries and donuts are easiest to arrange fresh.
21. Classic Dessert Bar Setup
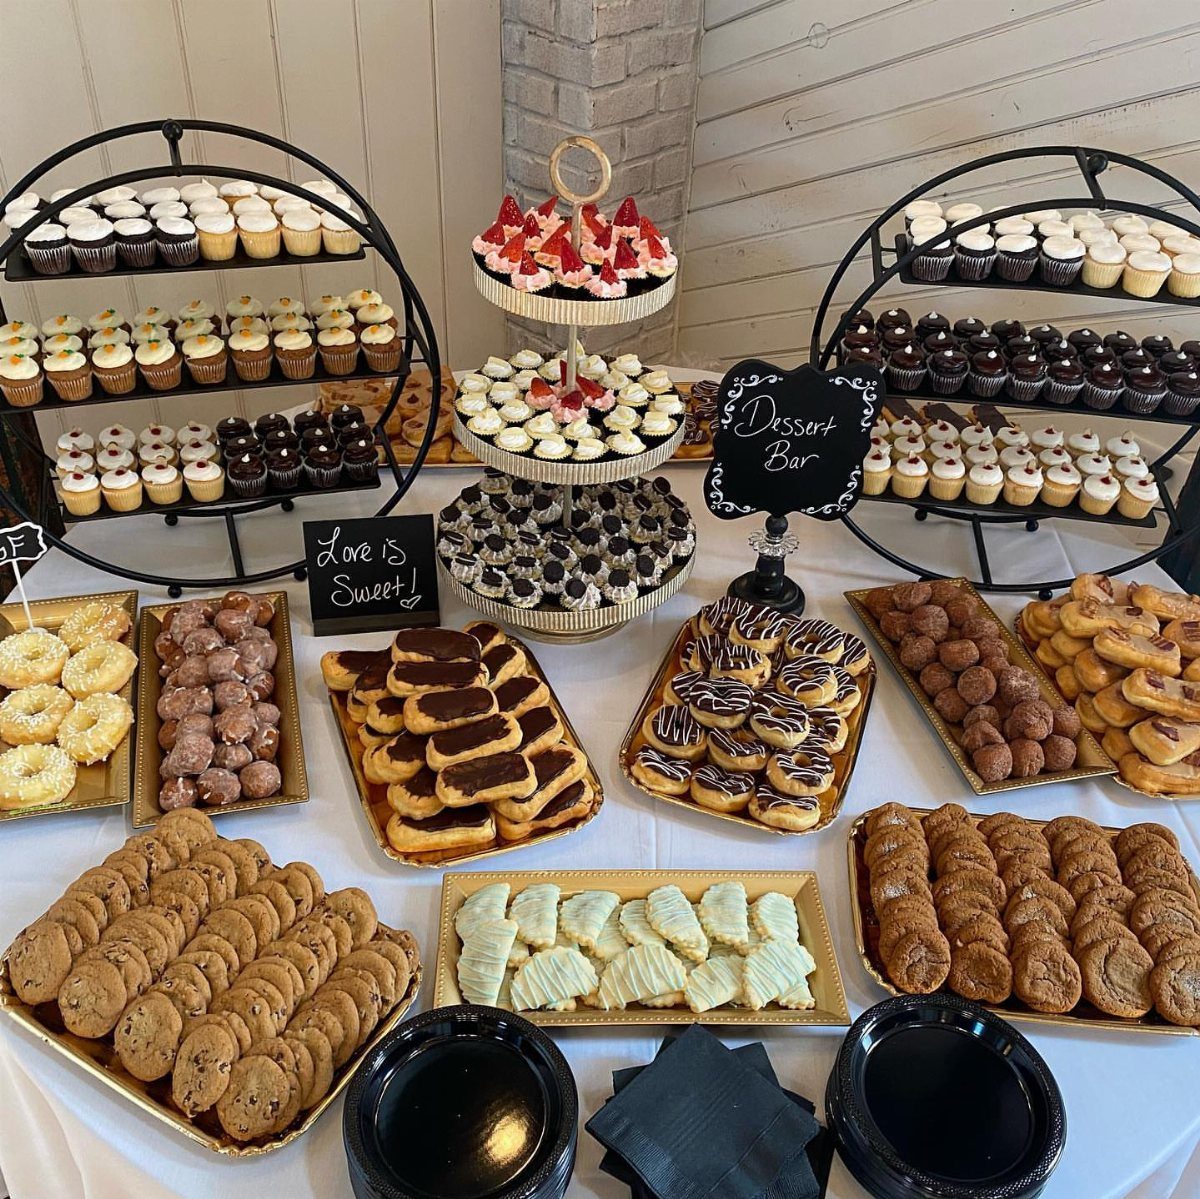
Tiered black stands hold cupcakes in a small space, and gold platters give donuts and eclairs a place to sit apart from them. 2 finishes, black and gold, look chosen even when every dessert came from a bakery.
A small framed "Dessert Bar" sign tells guests the table is open.
I would add a second line of text, like "Love is Sweet!", to make it fit the occasion. Cookies fill the empty gaps between the stands.
22. Green Tulle and Mini Parfaits
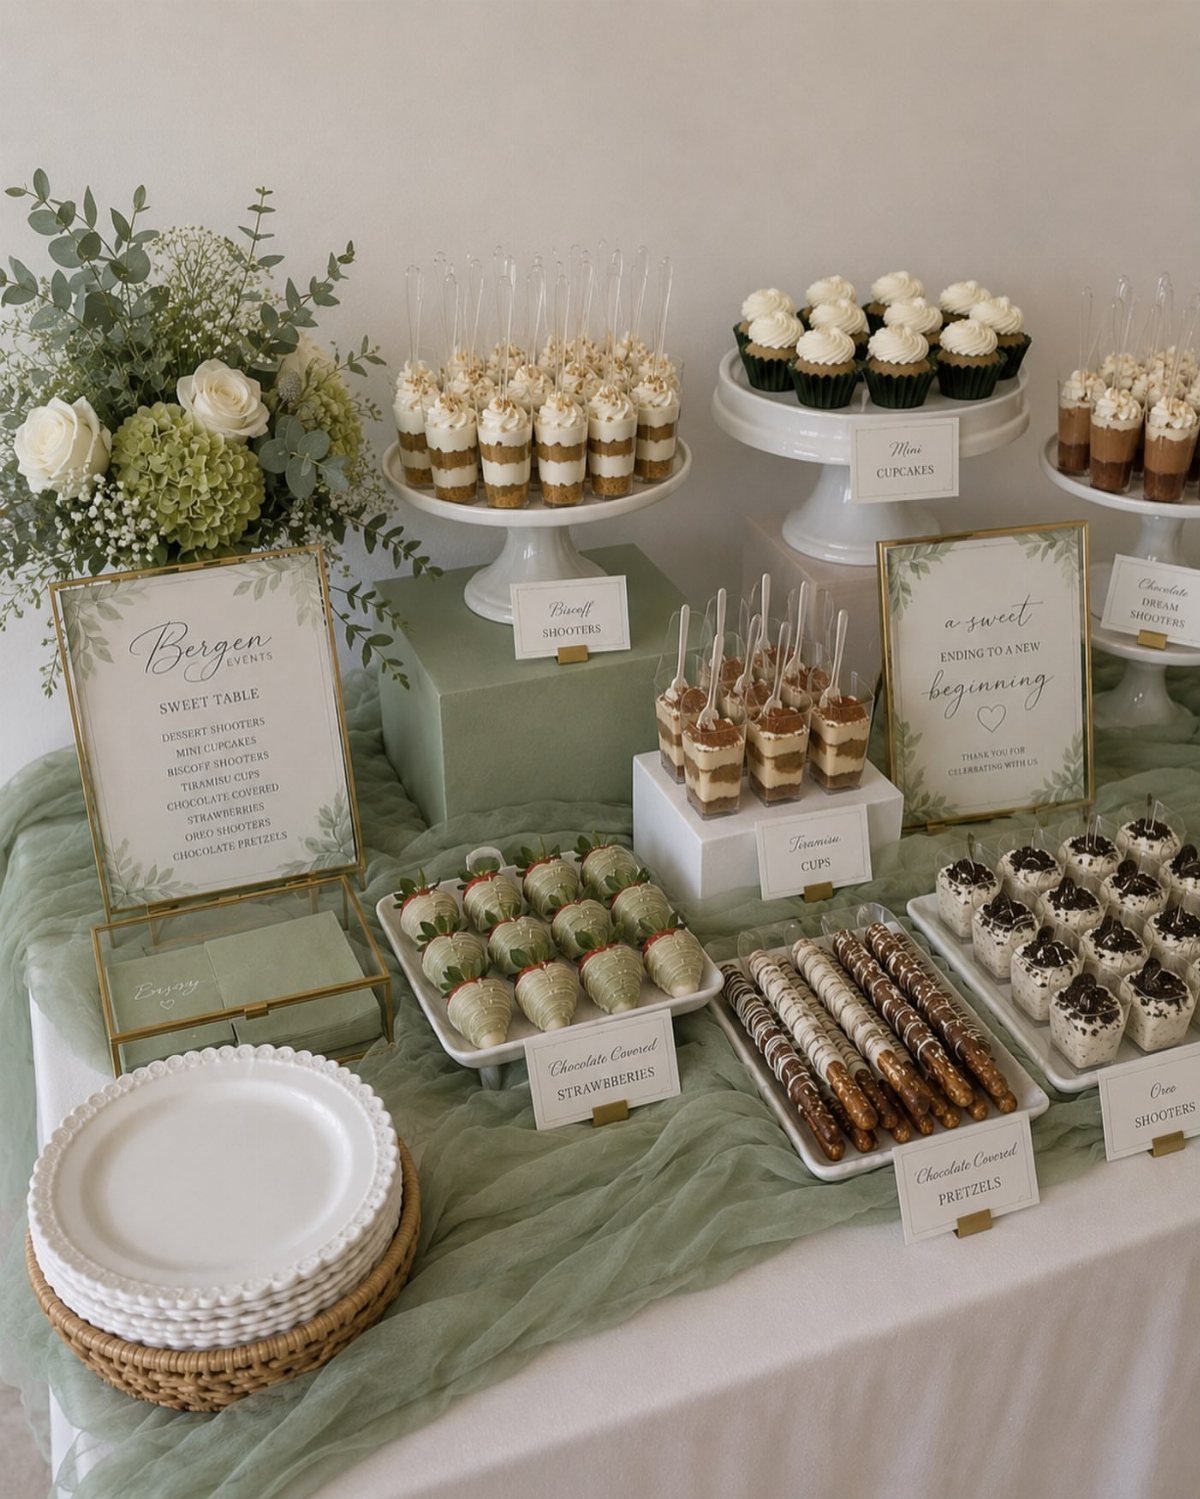
A soft green tulle runner down the middle of the table costs little and sets the color for everything on it. Dipped strawberries, mini parfaits and cupcakes all look at home against it.
I would put the parfaits on tiered trays so they sit at eye level, with the vases of white flowers kept low.
Framed signs for the menu or a short message, like "a sweet ending to a new beginning," make a small table feel finished. Individual cups mean no serving at all.
23. Funfair Treat Machine Station
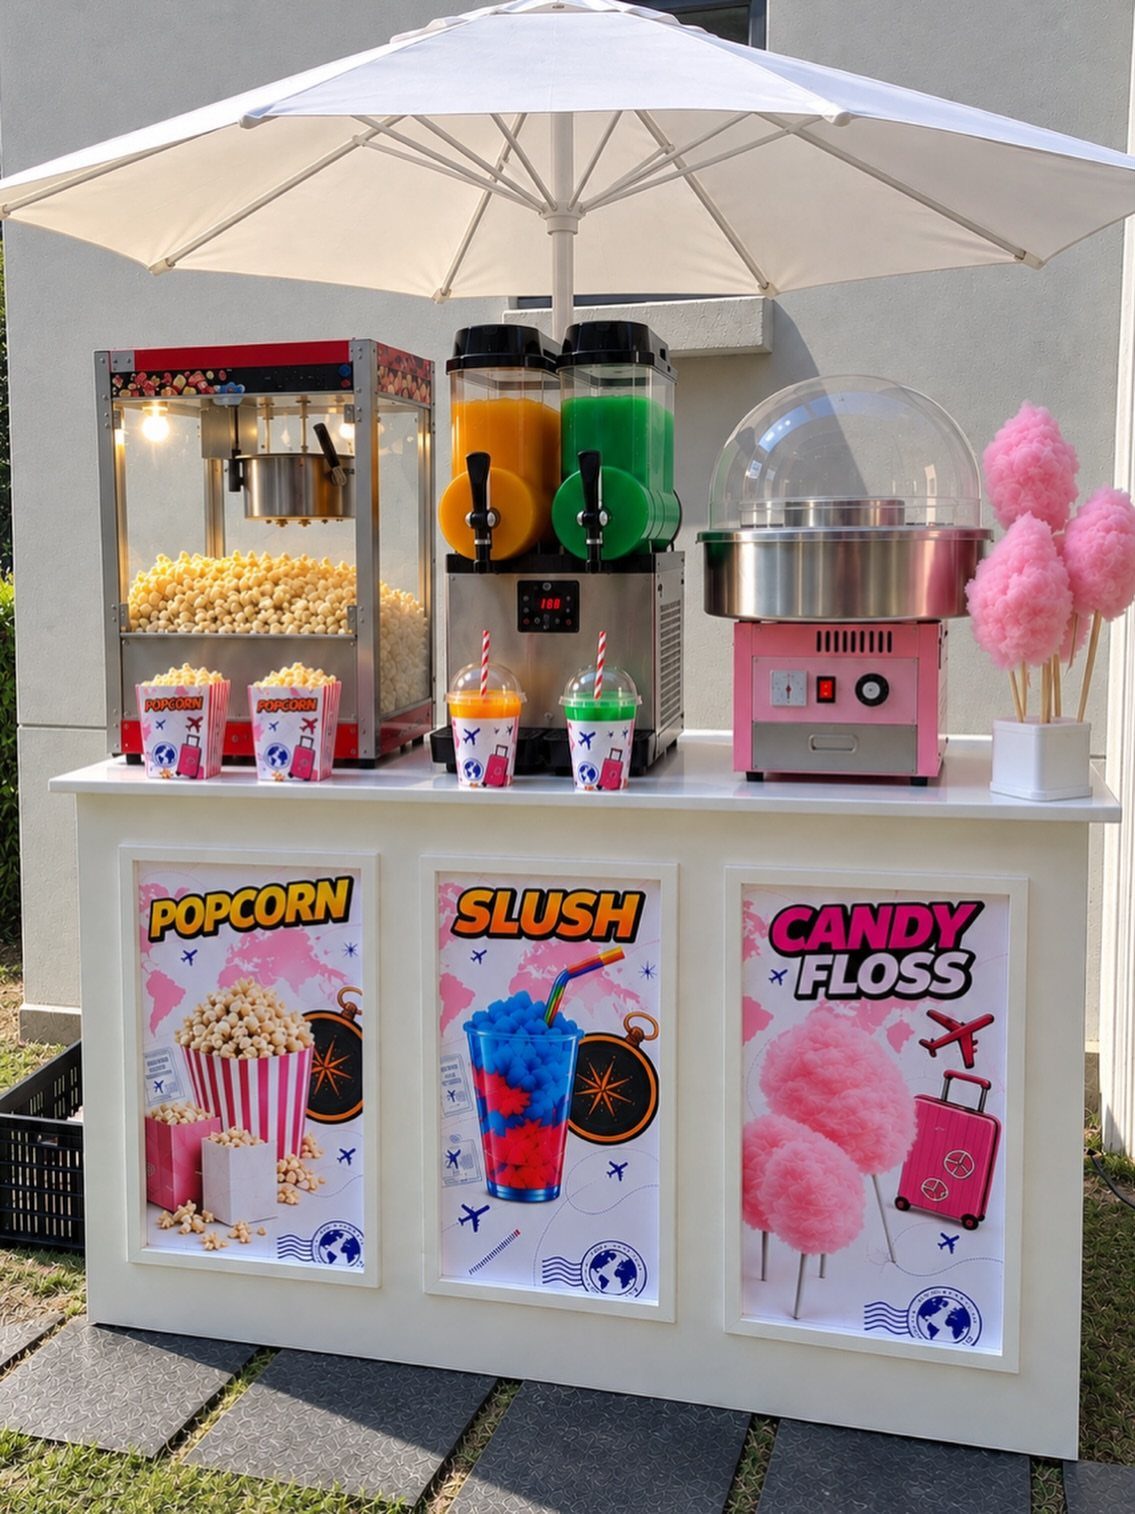
Popcorn, slushie and cotton candy machines make dessert feel like a funfair, and each one needs only a sign and a stack of cups or bags. Outdoors, an umbrella over the white table gives them shade.
I would rent or borrow the machines rather than buy them, since they get used once.
Label each machine with a plain sign, as in "Popcorn," "Slush" and "Cotton Candy," and store the extra supplies underneath. Cotton candy in pink gives the table its color.
24. Pink Checkered Tablecloth Spread
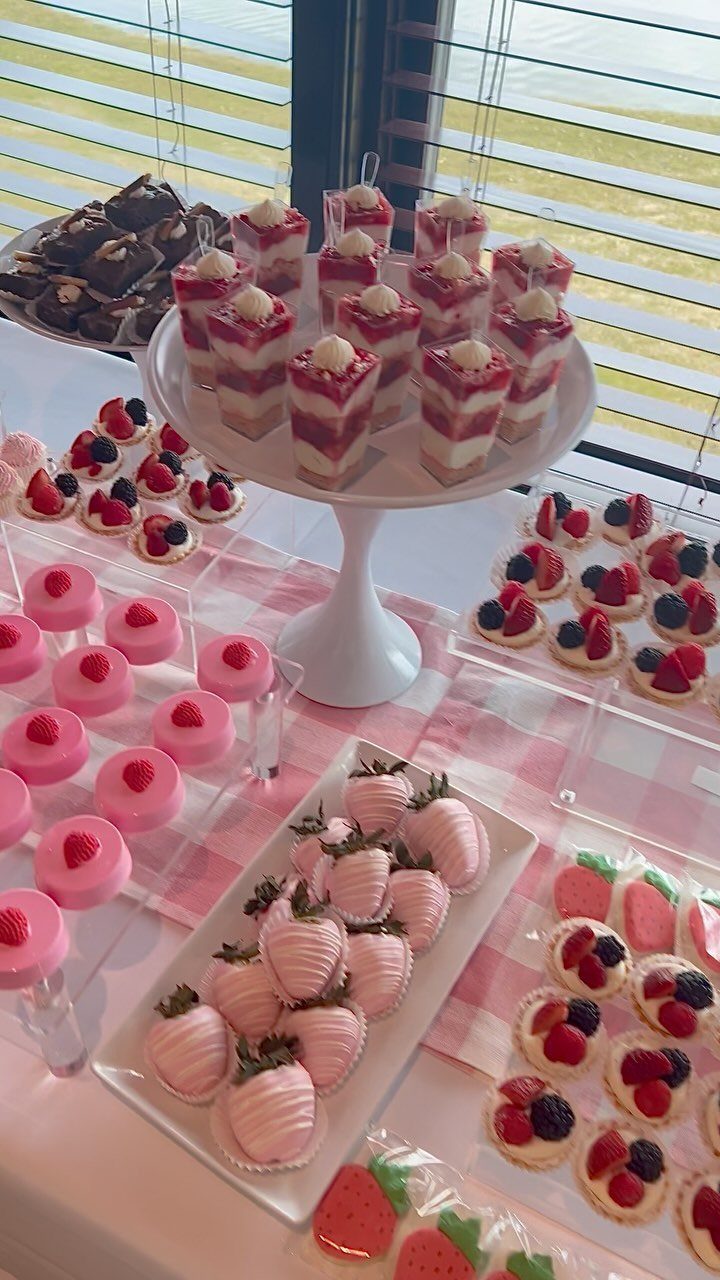
A pink and white checkered cloth is the whole decoration here. Mini mousse cakes, layered strawberry cakes, brownies and dipped strawberries sit on it with no extra styling, so the cloth does the work.
Stay with pink, white and chocolate brown so the food and the pattern agree.
I would buy the mousse cakes and tarts, then dip the strawberries myself, since that step is quick. Brownies break up all the pink with something dark.
25. Mini Dessert Shooters Display
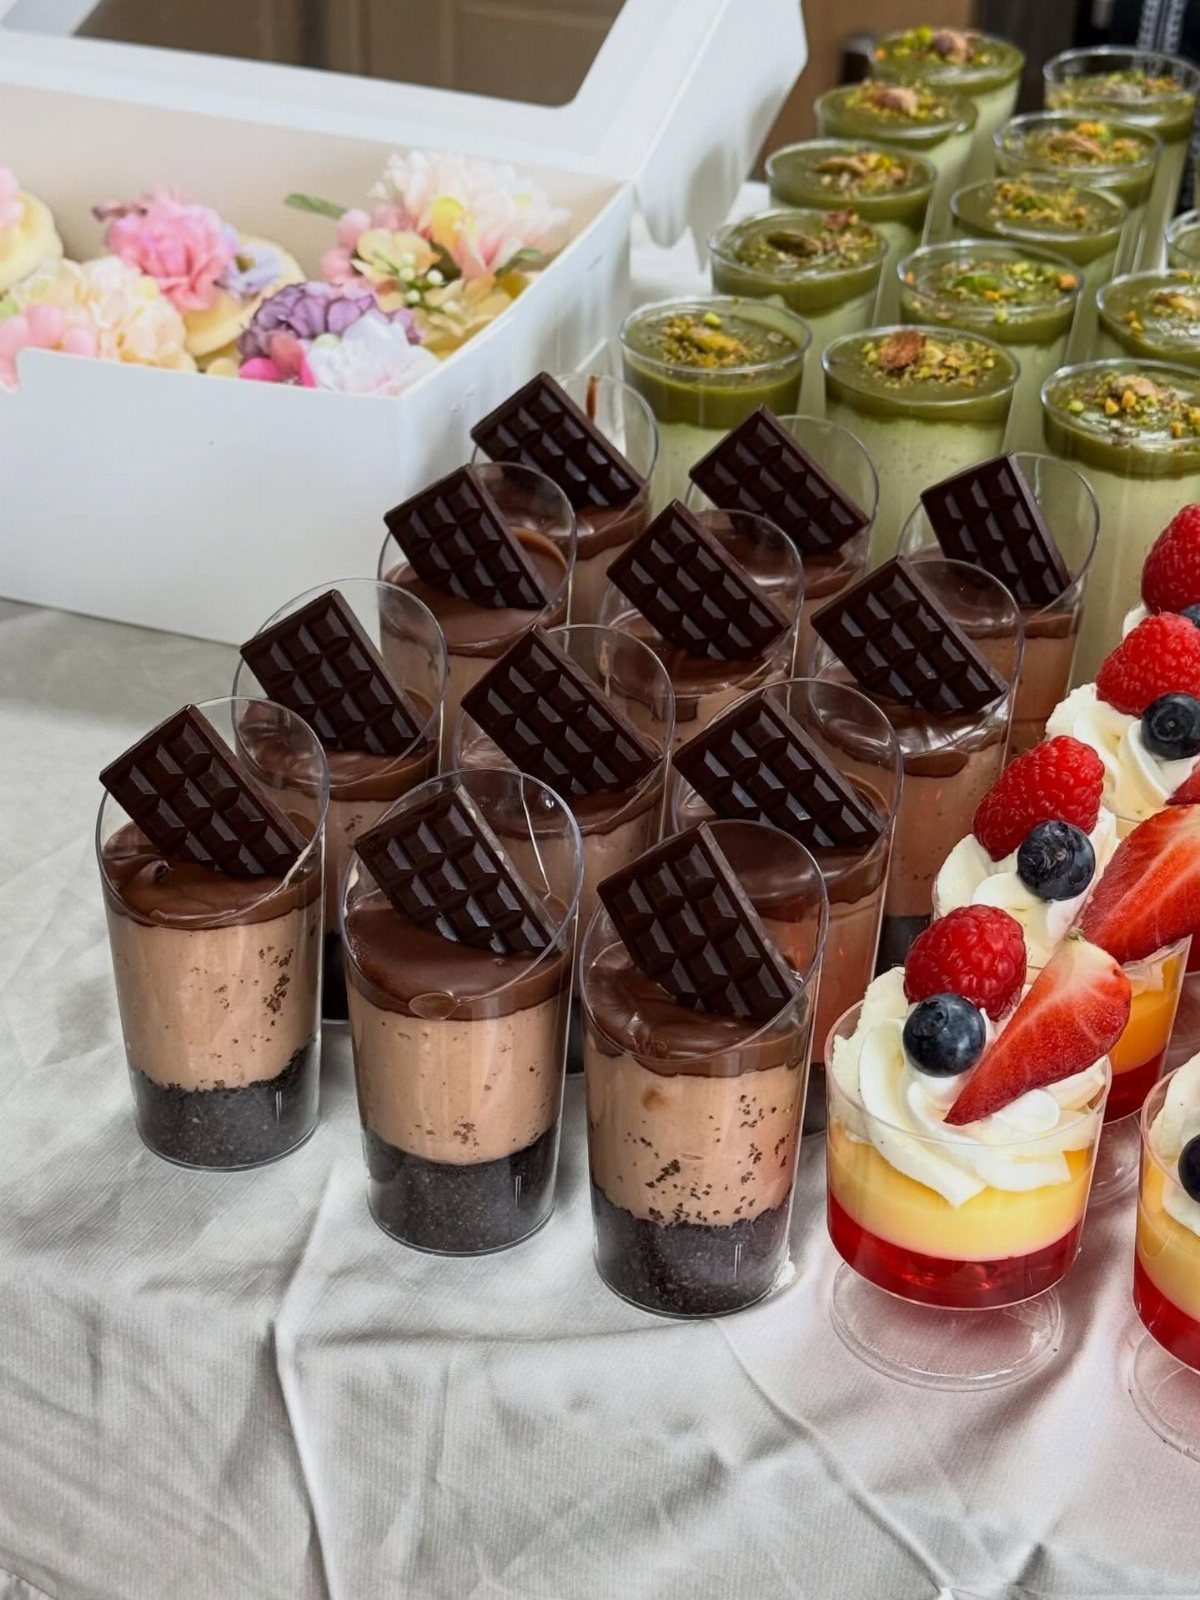
Clear cups show off their layers, so chocolate mousse, pistachio cream and fruit parfaits look finished before anyone tastes them.
Because each cup is a single serving, nobody needs a knife or serving spoon, which helps a host who is busy greeting guests.
I would line the cups in tight rows by flavor, so the 3 colors read as stripes across a white cloth. Make them ahead and keep them chilled until the party starts, then bring them out in batches.
A low box of flowers beside the rows adds softness without taking up serving space.
Why Dessert Tables Are Must-Haves
A dessert table does 2 jobs at once: it decorates the room and gives guests something to do. People drift toward it, linger, and start talking, so it ends up as the gathering spot of the party.
Instead of one cake on a counter, you offer a spread to look at as well as eat. If dessert is being served anyway, a table is the right call.
Holiday dinners and big themed parties suit it best, since the table can carry the festive look of the day. A Thanksgiving pie display or a Christmas cookie setup would both work.
Essential Planning Tips
Measure the space before you plan a single dessert. Aim for a table guests can reach from more than one side, with enough floor around it to move without bumping elbows.
Stack the plates and napkins at the head of the table, where guests reach them before they reach any dessert, and nobody ends up juggling a cupcake with no place to set it.
Add height with stands or risers so everything stays visible and within reach.
Keep the table out of direct sun and away from heating vents. Chocolate melts, frosting softens, and candy turns sticky, so a cool, shaded spot protects the food.
A solid-color cloth or a quiet pattern works best, since the desserts should be what people look at.
Light shades feel casual and dark ones have more impact. For casual parties, let the cloth hang 6–10 inches over each edge; a formal table calls for a longer drop, down to the floor at about 30 inches on a standard table.
Start with the tallest centerpiece, such as a tiered cake stand or a cupcake tower, and build the shorter platters around it.
Keep the tall pieces toward the back or center so a guest can reach the sweets in front without brushing against them.
Styling Secrets for Dessert Tables
Group desserts by color so the table follows your party’s palette. Space the pieces evenly, because a table that is heavy on one side looks lopsided.
Group items in odd numbers, such as 3 or 5. It reads as more natural than pairs or fours.
For texture, I stack a few layers: a tablecloth first, then a runner, then placemats or boards under the platters. A backdrop of fabric, streamers, or wall art frames the whole thing.
Small cards listing the main ingredients next to each dessert help guests with allergies, and they help everyone else who wants to know what they’re biting into.
Finish with a little sparkle: edible glitter or sprinkles on the food, and fairy lights around the edges.
Frequently Asked Questions
What do you put on a dessert party table?
Anchor the table with one tall piece, a tiered cake or a cupcake tower, then surround it with bite-size sweets: macarons, brownies, mini tarts and chocolate-dipped strawberries.
Add plates, napkins, stands and serving tools at the head of the table, plus a sign or flowers that match your theme.
Store-bought treats work fine if you keep the colors to two or three, because the palette is what makes the table look planned.
How long should a tablecloth be for a dessert table?
For a casual party, let the cloth hang 12–20 inches over each edge.
Pick a solid color or a pattern so quiet it barely registers, because the desserts should be what people look at. Pale cloths read casual, and deep shades give the table more drama.